Author: Admin

  • Can You Retrofit GPS Guidance to an Excavator? Practical Guide

    Can You Retrofit GPS Guidance to an Excavator? Practical Guide

    Published by Nonnav · Updated August 2026 · 9 min read

    Key Takeaways

    • Many conventional excavators can support an aftermarket GPS/GNSS guidance kit, but compatibility depends on antenna clearance, power, linkage geometry, hydraulic condition, and the kit supplier’s approved machine configuration.
    • A wireless excavator guidance retrofit can reduce cabling and downtime compared with a wired installation while allowing the machine to keep its original operator controls. Hardware, installation, calibration, and training time vary by machine and accuracy tier.
    • Start with five checks: antenna mounting space, power, measurable linkage geometry, hydraulic condition, and support for the machine’s boom and attachment configuration.

    5 checks
    Retrofit readiness

    6 steps
    Install and calibration

    2D / 3D
    Guidance options

    By site
    ROI calculation

    What “Retrofit” Actually Means for an Excavator

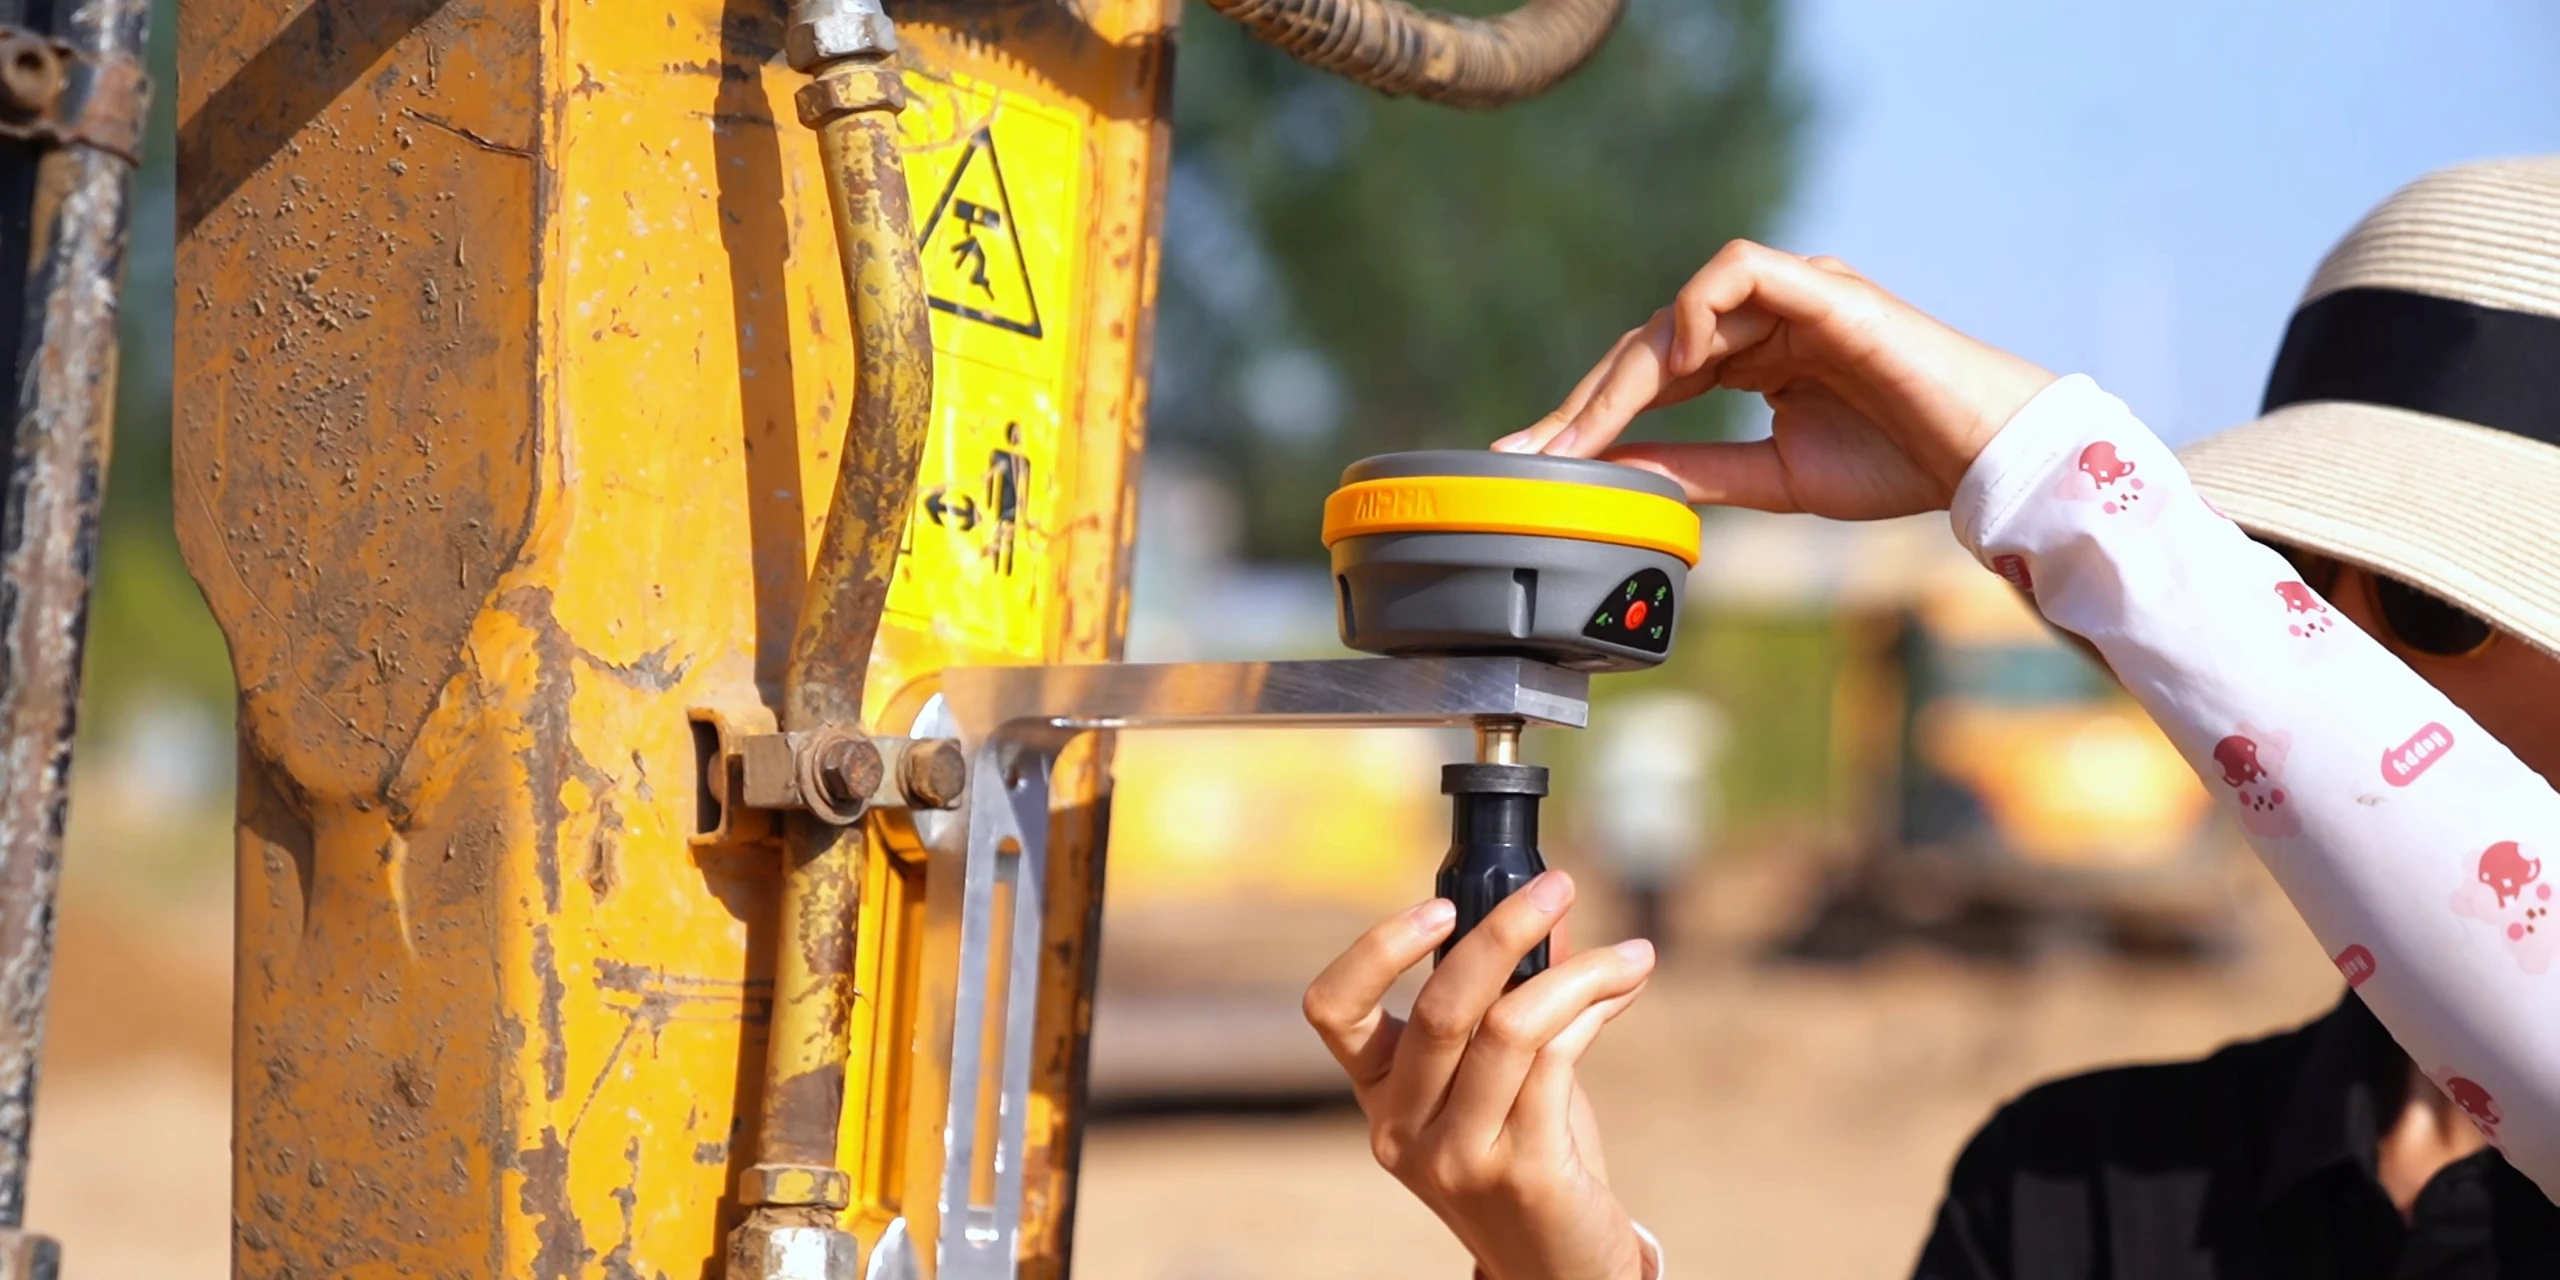
    Retrofitting GPS guidance means adding a GNSS receiver, antennas, and motion sensors to an existing excavator without changing the machine’s hydraulic system, joysticks, or cab electronics. The guidance system reads the bucket position from satellite signals and sensors, then shows the operator where to dig on a screen. It does not drive the machine. The operator still controls everything; the system just removes the guesswork about depth, slope, and grade.

    This matters because the biggest cost in earthwork is not the machine. It is the rework. A bucket that goes 5 cm too deep across a 500 m trench line costs hours of backfill and recompaction. Retrofit guidance attacks that cost directly.
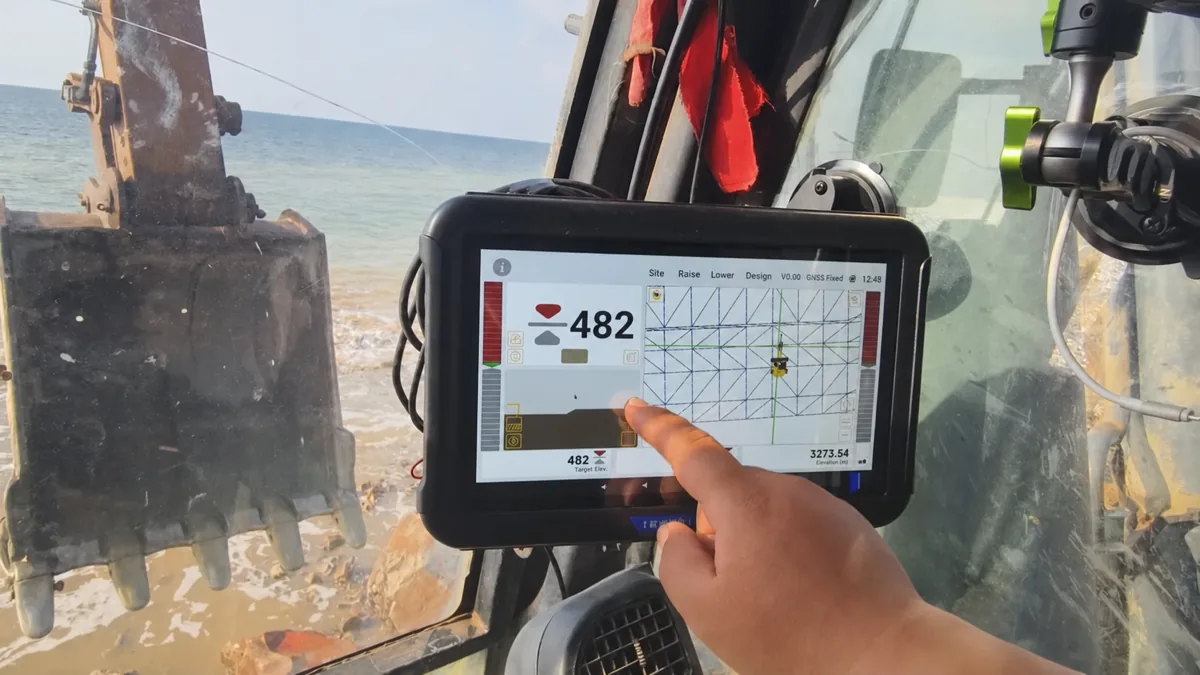
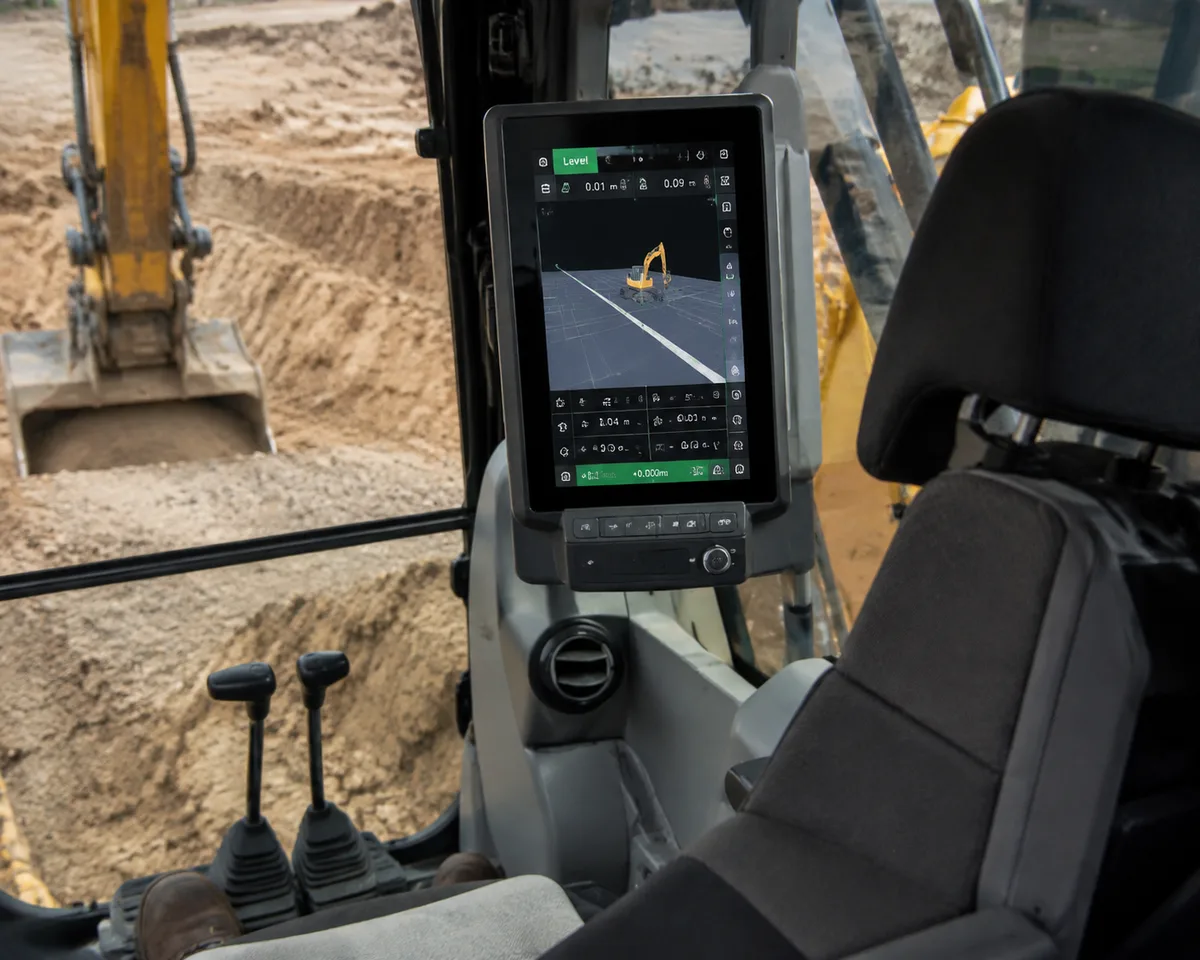
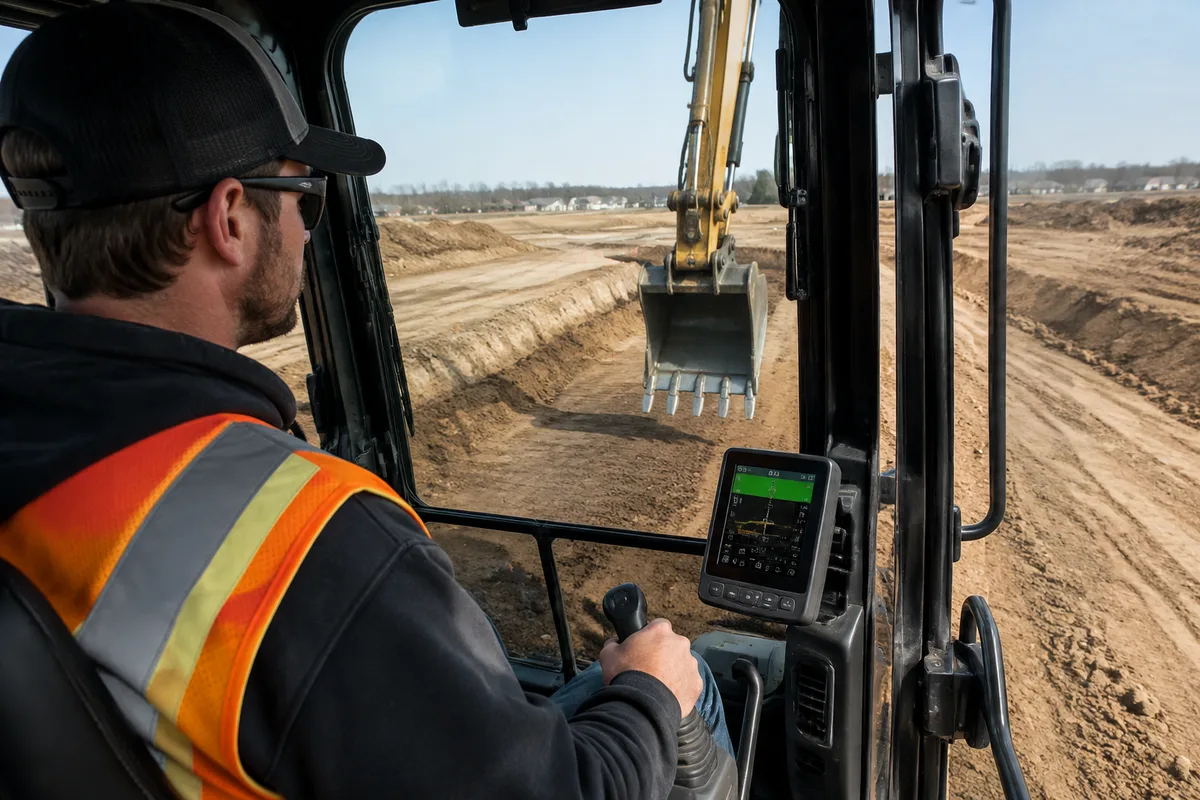
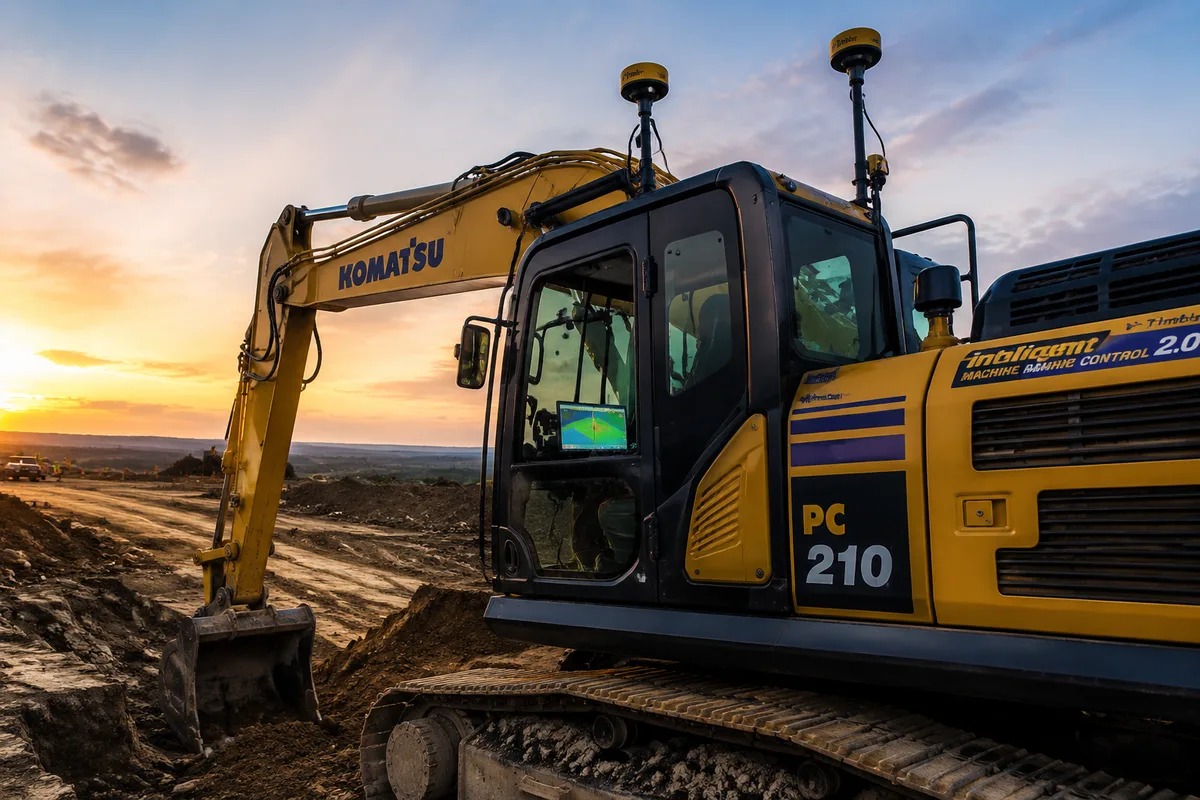
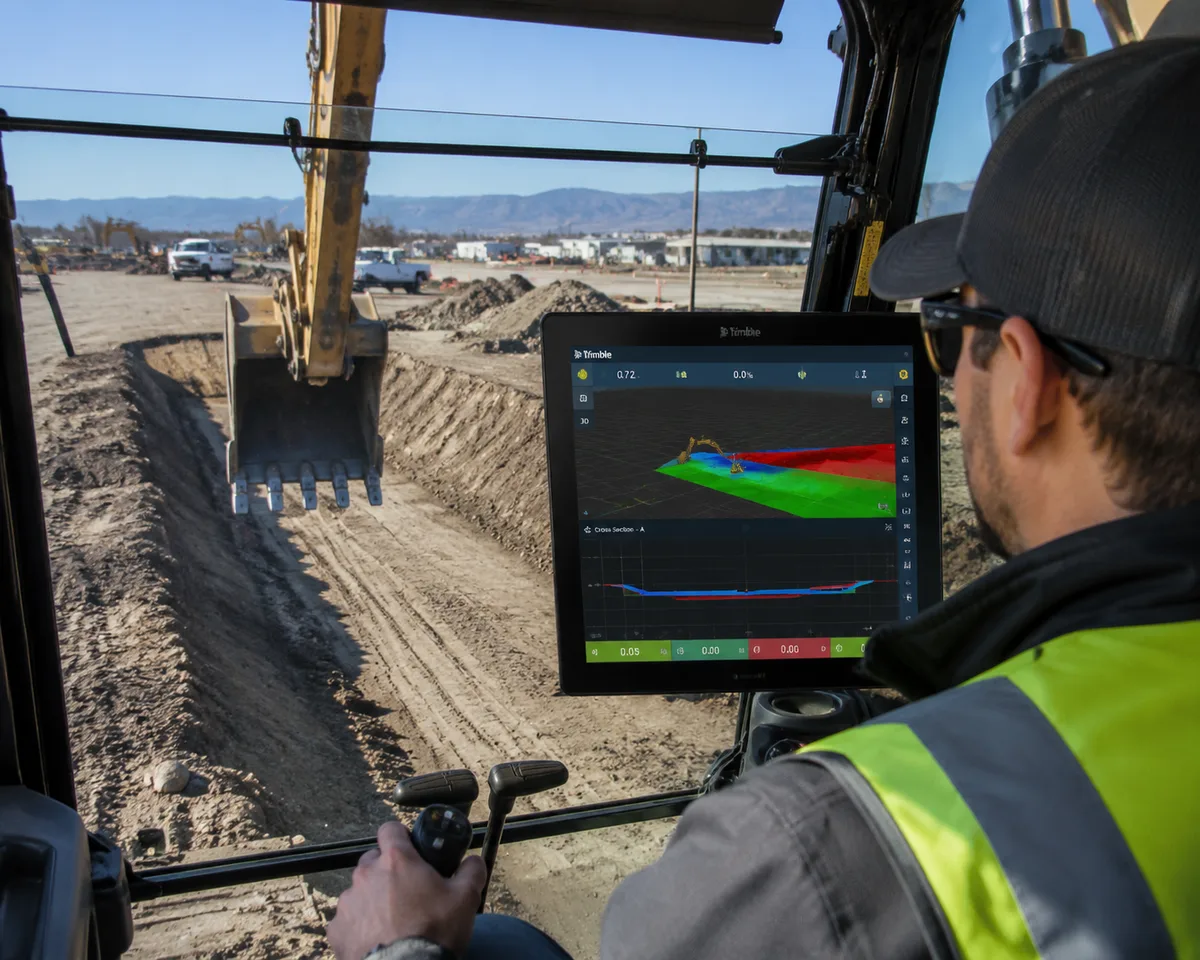
    Excavator operator reading GNSS cabin display with mesh design on coastal site
    Operator checks the cabin display for depth and slope during coastal grading

    The Compatibility Checklist

    Not every machine takes a retrofit kit the same way. Work through this checklist before buying anything.

    1. Cab roof and antenna placement. The GNSS antennas need a clear view of the sky. Problems appear when the roof has a falling-object guard, or air conditioning units, beacons, or cameras already block the antenna spot. A clear roof area may provide enough space, but the final position must also meet the mounting kit, guarding, antenna separation, and sky-view requirements.

    2. Power feed for the display. The in-cab display needs 12V DC. Many modern excavators have auxiliary outlets. Older machines may need a qualified technician to add a fused circuit; the scope and installation time depend on the machine wiring and the selected display.

    3. Boom, arm, and bucket geometry. Calibration enters boom length, arm length, and bucket dimensions, then swings the machine through a full rotation. The positioning calculation is not tied to one brand, but the kit still needs a supported sensor layout and calibration model. Telescoping, offset, long-reach, and other non-standard boom or attachment configurations require supplier confirmation.

    4. Hydraulic behavior. Guidance assumes the bucket holds its position while you read the screen. Machines with tired hydraulic rams that drift when the joystick is released will show a slowly changing depth. A machine that cannot hold grade manually will not hold it with guidance either.

    5. Year of manufacture. Year of manufacture is only an initial screening signal, not a pass-or-fail rule. Confirm the mounting, power, sensor layout, machine condition, and vendor support for the specific model.

    KEY DATA POINT

    Brand alone does not determine compatibility. GNSS positioning uses satellite signals and measured linkage geometry, but the exact machine model, boom, attachment, sensor mounting, and supported calibration profile must still be checked.

    What Comes in a Retrofit Kit

    Component What it does Where it mounts
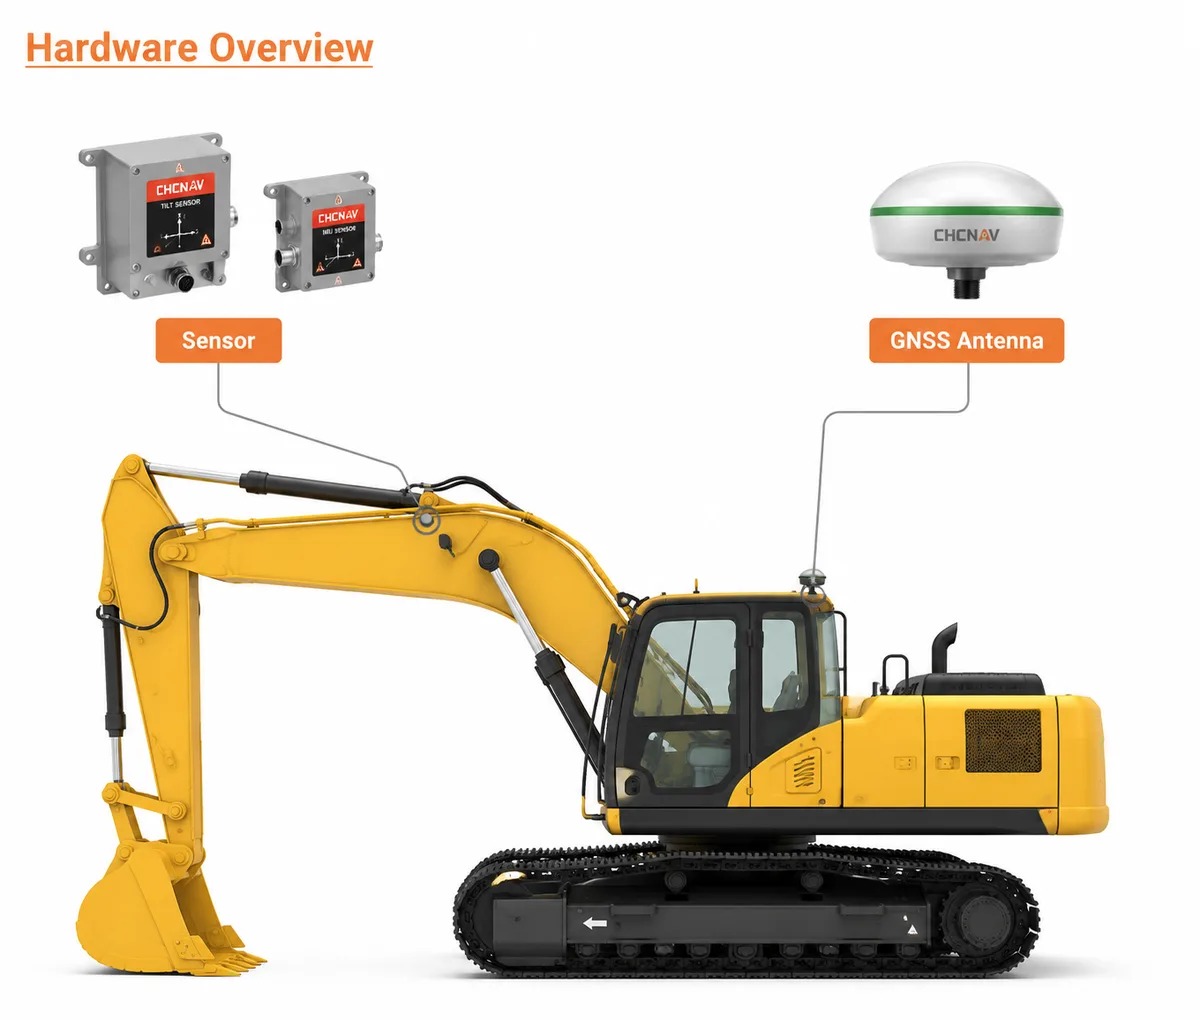
    GNSS receiver Computes position from satellite signals Cab roof or boom
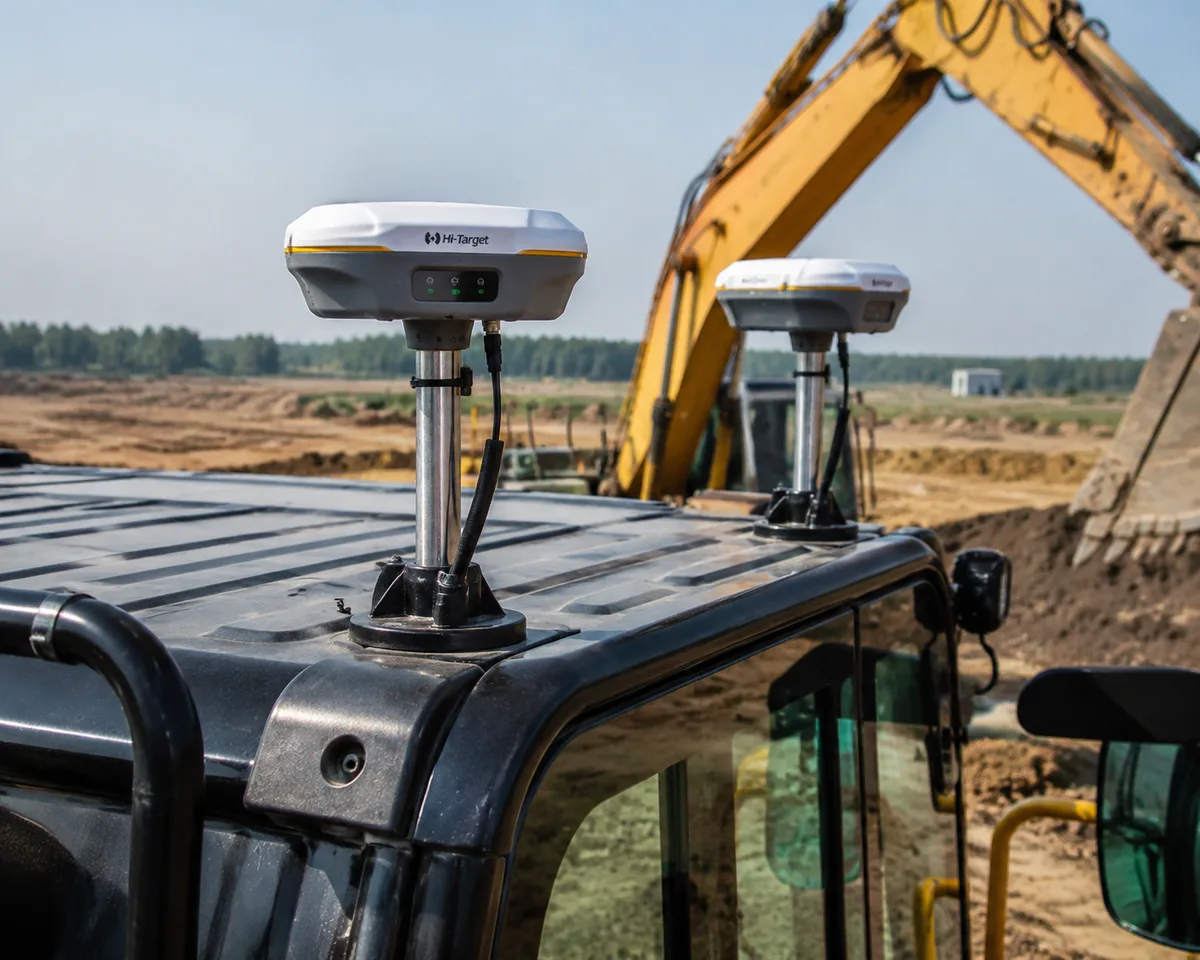
    Dual antennas Measures heading so the machine knows which way it faces Cab roof
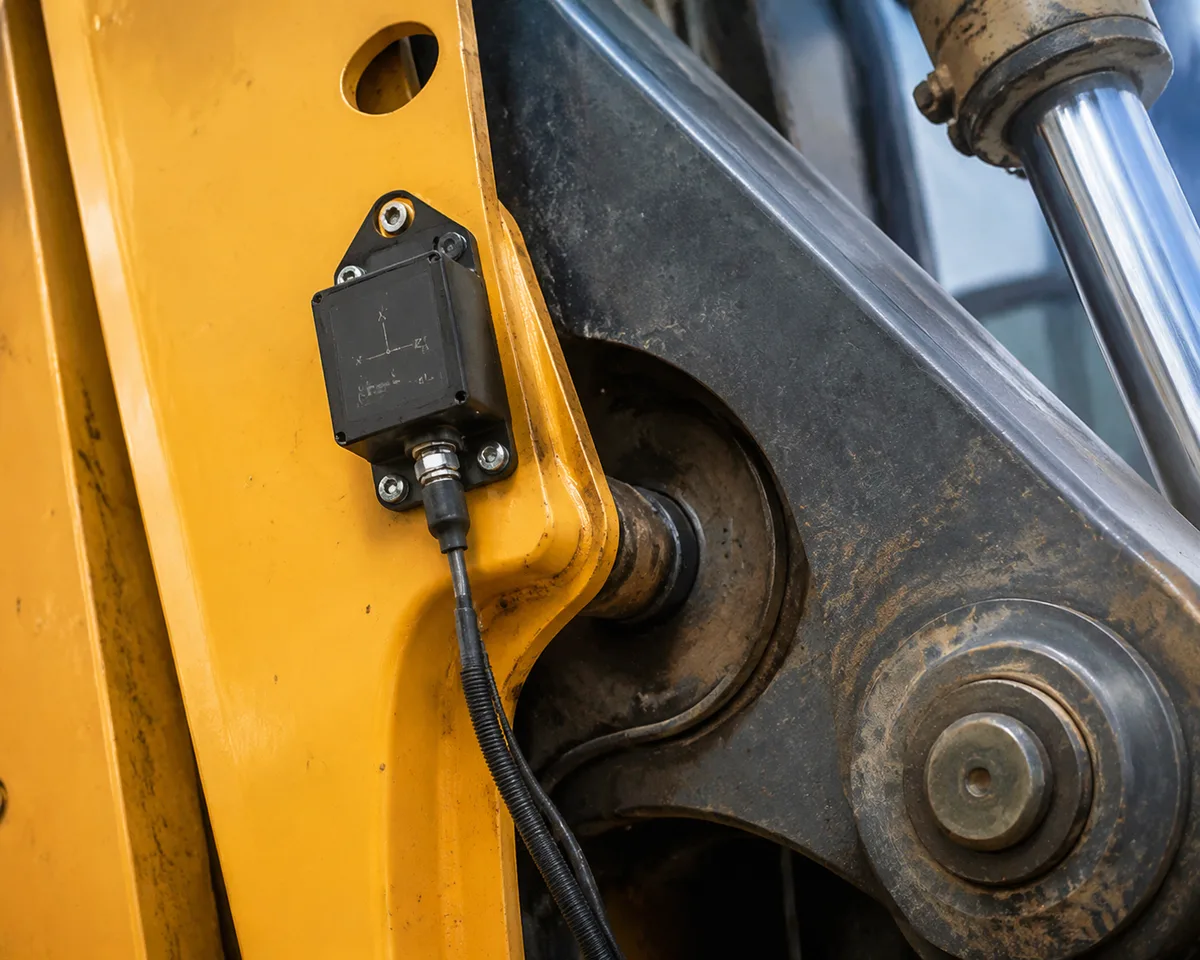
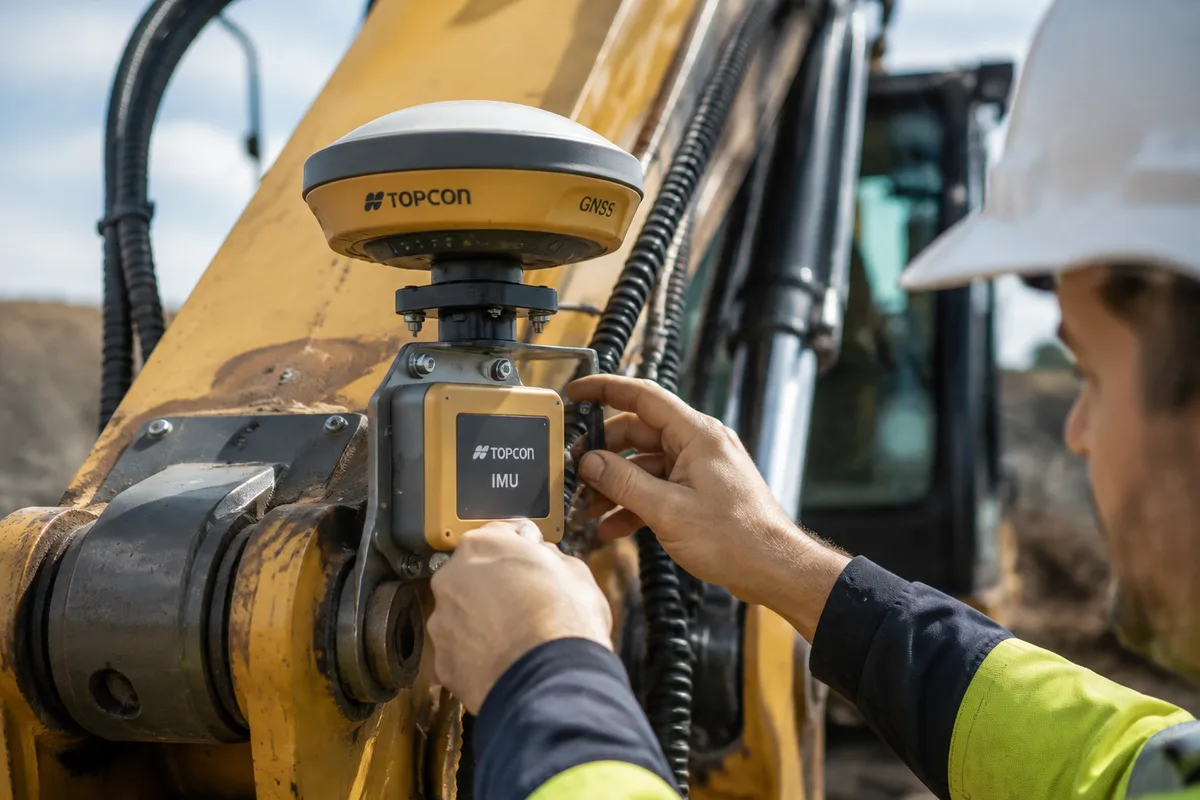
    IMU sensors Track boom, arm, bucket angle for 3D bucket position Linkage joints
    In-cab display Shows depth, slope, and grade to the operator Cab, operator’s line of sight
    Wireless bridge Sends sensor data to the display without cabling Roof to cab

    The wireless bridge is the part that changed the retrofit market. Older kits ran cables from the roof antennas down through the cab, which meant drilling holes and a half-day install. A wireless kit can reduce cabling between the roof and display. Total commissioning time still includes mounting, power setup, geometry entry, calibration, survey verification, and operator configuration.
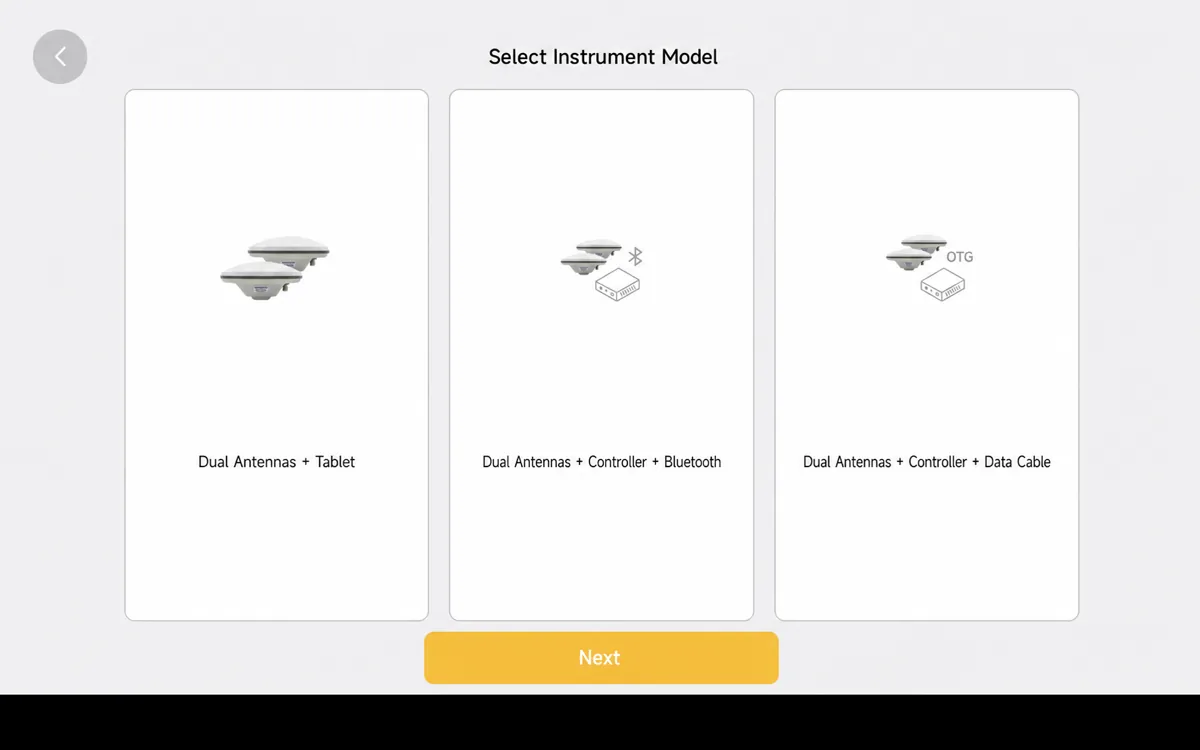
    GNSS retrofit device module options: dual antenna tablet, controller, bluetooth
    Device module options configure the retrofit kit to the machine
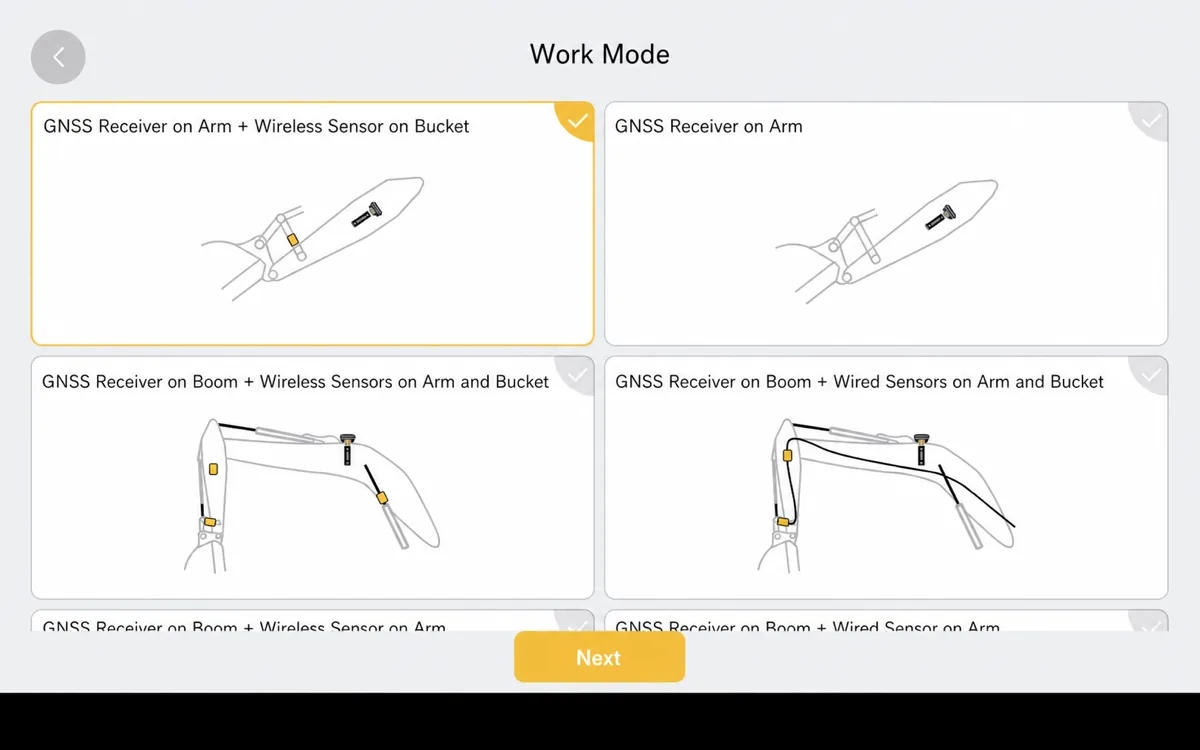
    GNSS retrofit installation modes showing receiver and sensor mounting options
    Work modes show how receiver and sensors mount on any excavator

    Retrofit vs. Buying New with Guidance

    Dimension Retrofit existing machine Buy new with guidance
    Upfront cost Varies by accuracy tier, sensors, correction service, installation, and support Machine price plus the factory option; request a regional dealer quote
    Install downtime Hardware mounting may be short; allow additional time for setup and validation 0 (factory installed)
    Existing fleet One kit can move between machines Stays with the new machine
    Resale A removable kit may limit permanent modification; verify resale and warranty terms Guidance adds value if documented
    Risk You keep the machine you know New machine, new payment

    For a detailed budget framework, see how much an excavator GPS guidance system costs and which factors change the final quote.

    The Installation Process in Six Steps

    Step 1: Pass the checklist. Confirm roof clearance, power feed, and boom geometry are workable.

    Step 2: Mount the antennas. Dual antennas mount to the cab roof using the selected bracket. Whether drilling is required depends on the roof guard, bracket, and approved installation method.

    Step 3: Mount the sensors. IMU sensors clamp to the boom, arm, and bucket linkage. Quick-release mounts may allow hardware to move between compatible machines, but each machine still requires its own measurements, calibration profile, and verification.

    Step 4: Power the display. Plug the display into the cab’s 12V outlet or a fused circuit.

    Step 5: Calibrate. Enter the boom, arm, and bucket dimensions from the machine’s spec sheet. Perform a full 360-degree swing calibration. Dig two test trenches and check against a survey reading.

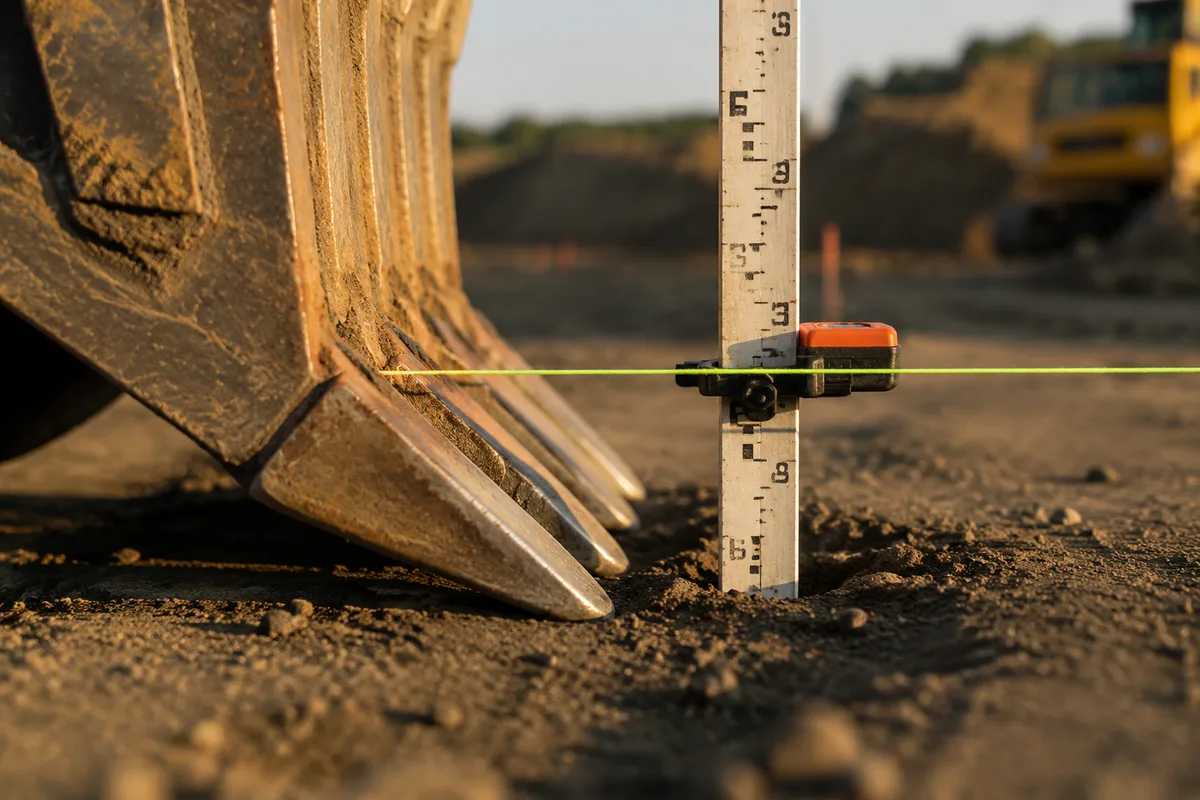
    Step 6: Verify with a grade check. Set the machine to cut at design depth on a test pass, then confirm with a level or total station.
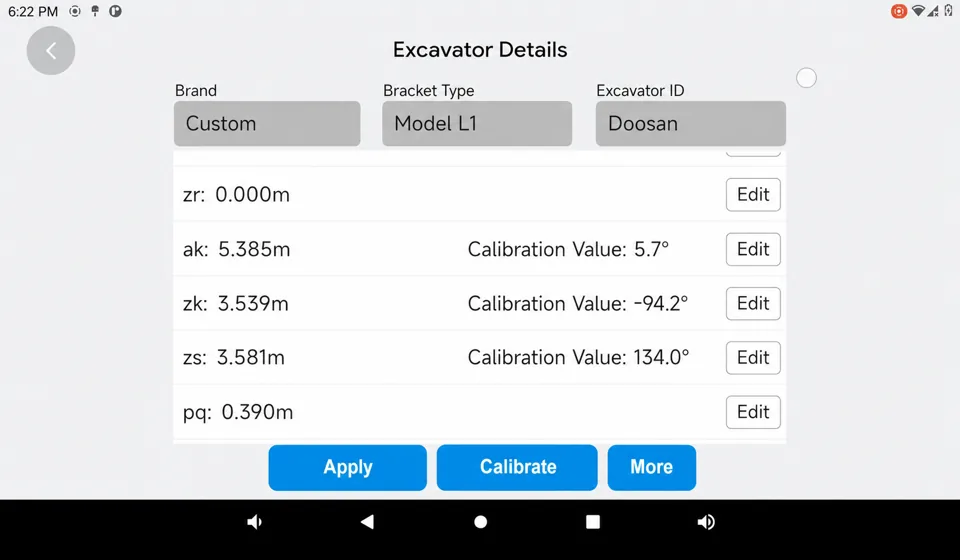
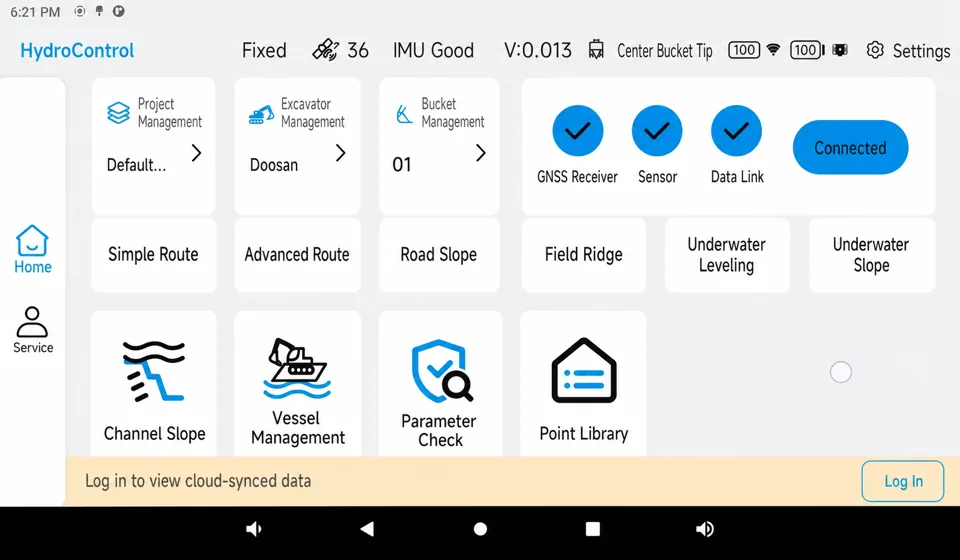
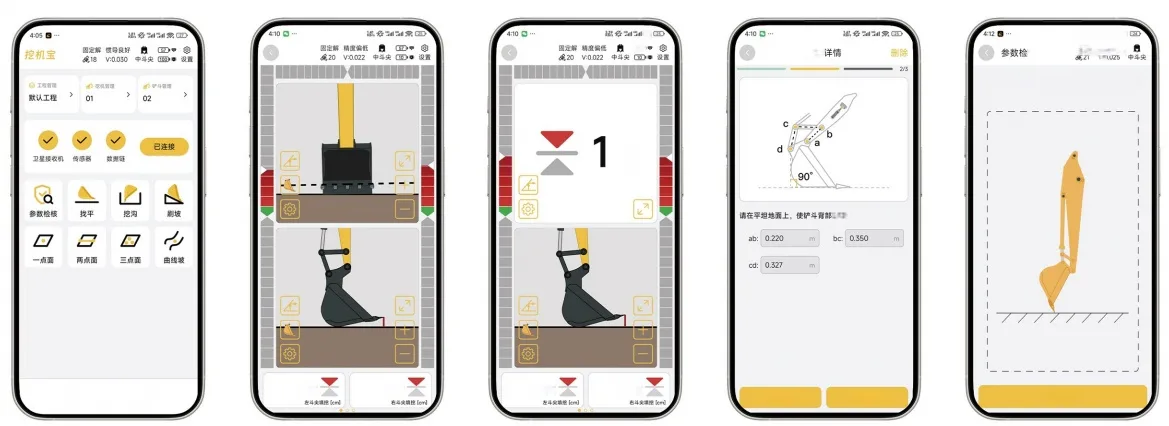
    Excavator GNSS calibration parameters for bucket and arm sensors
    Calibration enters boom, arm, and bucket dimensions for the machine
    Excavator GNSS app home screen showing connected receiver and sensors
    The app confirms receiver and sensors are connected after install

    Can Your Excavator Be Retrofitted? Quick Compatibility Check

    If the machine regularly performs precision work → Calculate retrofit payback using rework, grade-checking, staking, utilization, correction-service, and training costs.

    If the machine is near replacement → Compare both paths using remaining service life, repair risk, utilization, and the cost of a factory-guidance replacement.

    If you run a mixed fleet across sites → Ask whether the kit is portable; supported machines need separate profiles and verification after transfer.

    If your work is bulk earthmoving with ±10cm tolerance → Retrofit is optional; laser or simple guidance may be enough.

    NOT SUITABLE WHEN

    The machine is near replacement, has no approved antenna position, cannot hold a stable bucket position, uses an unsupported boom or attachment configuration, has very limited precision work, or requires automatic hydraulic control that the selected system does not support.

    Common Misconceptions

    “Retrofit voids the warranty.” Some guidance kits use external mounts and a standalone display, while other configurations connect to machine systems. Review the machine warranty and the selected kit’s installation requirements before work begins.

    “It only works on certain brands.” GNSS guidance uses satellite signals and measured geometry, so the concept is not limited to one brand. Compatibility must still be confirmed for the exact model, boom, attachment, mounting method, and calibration profile.

    “The operator has to learn a whole new system.” The display presents familiar cut, fill, and slope information in real time, but training time depends on operator experience, workflow complexity, site models, and the selected system.

    “It will interfere with the machine’s electronics.” Many guidance-only configurations use their own sensors and display, but connections vary by system and feature set. Confirm power, data, CAN-bus, and hydraulic-interface requirements before installation.

    Is an Excavator GPS Retrofit Right for Your Machine?

    Retrofit GPS/GNSS guidance can bring precision information to a suitable existing excavator without immediately replacing the machine. A sound decision starts with model-specific compatibility, installation and calibration scope, required accuracy, correction service, operator workflow, and a site-based return calculation.

    If You Only Remember One Thing: A machine that holds grade, has an approved antenna position, and supports a verified sensor and calibration layout is a strong retrofit candidate; confirm the full configuration and calculate ROI from your own site data before purchasing.

    Request an Excavator Retrofit Compatibility Check

    Send the make, model, year, boom or attachment type, typical work, and target accuracy. Nonnav will review the configuration and recommend the next compatibility checks before preparing a quote.

    Frequently Asked Questions

    Can GPS guidance be added to an old excavator?
    +

    Many older excavators can accept guidance, but age alone does not decide compatibility. Check power, antenna mounting, linkage geometry, hydraulic condition, attachment type, and support for the exact machine configuration.

    How long does it take to retrofit an excavator with GPS?
    +

    Hardware mounting can be relatively quick on a prepared, supported machine. Total commissioning also includes power setup, geometry entry, calibration, survey verification, software setup, and operator training, so request a machine-specific estimate.

    Will retrofitting affect my excavator’s resale value?
    +

    A removable guidance-only kit may limit permanent modification, but the effect on warranty and resale depends on the mounting method, electrical connections, machine condition, documentation, and local market. Check the machine and kit terms first.

    Which excavator brands can be retrofitted?
    +

    The guidance principle is not brand-specific, but compatibility is model-specific. Confirm the exact excavator, boom and attachment geometry, sensor mounting, power, calibration profile, and vendor support before ordering.

    What is the cost difference between retrofit and factory guidance?
    +

    Costs vary by accuracy tier, sensors, display, correction service, installation, training, and support. Compare a machine-specific retrofit quote with the full regional price and remaining service life of a factory-guidance replacement.

    References & External Resources

    [1]

    Trimble Civil Construction: Machine Control Systems Overview
    Industry reference for machine control system categories and capabilities.
    [2]

    Topcon Positioning: Excavator Machine Control
    Topcon’s excavator machine control product line and retrofit options.
    [3]

    Leica Geosystems: Machine Control Solutions
    Leica’s machine control solutions for construction equipment.
    [4]

    Construction Industry Institute: Technology Payback Research (2024)
    Industry research on construction technology adoption and payback.
    [5]

    Caterpillar: Grade Control for Excavators
    Factory grade control options for comparison with retrofit kits.
    [6]

    Komatsu: Machine Control Systems
    Komatsu’s factory-installed machine control technology.

  • GNSS Antenna vs IMU Sensor: Excavator Guidance Components

    GNSS Antenna vs IMU Sensor: Excavator Guidance Components

    Nonnav · Updated August 23, 2026 · Estimated read time: 9 minutes

    Key Takeaways

    • The GNSS antenna finds the machine in space; the IMU sensors measure how the boom, arm, and bucket are angled. Neither works alone, and together they compute the bucket tip position to ±2-3cm.
    • A single-antenna system without IMU sensors cannot hold accuracy during cab rotation or on slopes, which is exactly where excavators work. The IMU layer is what separates ±3cm guidance from ±10cm-class.
    • When buying or troubleshooting a guidance system, the configuration list matters more than the brand: how many antennas, whether IMU sensors sit on all three linkages, and whether the kit is wireless.

    ±2-3cm

    Dual Antenna + IMU

    2

    Antennas for Heading

    3

    Linkages with IMU

    ±8-12cm

    Single Antenna, No IMU

    The Two Components That Answer One Question

    Every excavator guidance system answers the same question: where is the bucket tip, and how far is it from where it should be? The GNSS antenna and the IMU sensor answer two halves of that question, and the system fuses their answers into one position.

    The GNSS antenna answers “where is the machine?” It receives satellite signals and, with RTK corrections, fixes the antenna’s position to ±2-3cm in global coordinates.

    The IMU sensors answer “how is the machine bent?” Mounted on the boom, arm, and bucket linkages, they measure the angle of every joint in real time. Combined with the known lengths of the linkages, that tells the system where the bucket tip is relative to the antenna.

    Neither half means much alone. A GNSS antenna without IMU data knows where the cab is, but not where the bucket is. IMU sensors without GNSS know the machine’s shape, but not its position. The system needs both.

    What the GNSS Antenna Actually Does

    The antenna is the machine’s eye on the sky. It picks up signals from GPS, GLONASS, Galileo, and BeiDou satellites, and its job is to turn those signals into a position fix.

    Single-antenna systems fix the position of one point on the machine, usually the cab roof. They know where that point is, but cannot tell the machine’s heading or its attitude on slopes without extra help.

    Dual-antenna systems fix two points, which gives the system the machine’s heading and orientation. This is the setup that holds ±2-3cm during full cab rotation.

    RTK corrections are what turn raw satellite data into centimeter-level accuracy. Without a base station or network correction source, the antenna’s fix degrades to meters. The antenna does not care about the bucket. It only knows where its own location is. Everything between the antenna and the bucket tip is the IMU sensors’ job.

    What the IMU Sensors Actually Do

    IMU stands for Inertial Measurement Unit. Each sensor contains accelerometers and gyroscopes that measure acceleration and rotation, which lets the system track the angle of the linkage it is mounted on.

    Boom angle: the angle of the main boom relative to the machine body. Arm angle: the angle of the stick relative to the boom. Bucket angle: the angle of the bucket relative to the arm. Machine attitude: pitch, roll, and heading of the machine body itself.

    With the three linkage angles and the machine’s attitude, the system calculates where the bucket tip sits in space relative to the antenna, using the known dimensions of the boom, arm, and bucket that you entered during calibration.

    Why it matters on an excavator: an excavator works by rotating the cab, lifting the boom, curling the arm, and tilting the bucket. Every one of those movements changes the bucket position. A system without IMU sensors on the linkages cannot track those changes, so accuracy collapses the moment the machine moves.

    IMU inertial sensor mounted on excavator boom linkage
    IMU sensors measure boom, arm, and bucket angles in real time

    How the Two Work Together: The Data Flow

    1. The GNSS antenna fixes the antenna position in global coordinates (with RTK corrections, ±2-3cm).
    2. The IMU sensors on the boom, arm, and bucket measure every joint angle in real time.
    3. The receiver combines the antenna position with the IMU angles and the calibrated linkage dimensions.
    4. The system calculates the bucket tip position in 3D space.
    5. The in-cab display compares that position against the design surface and shows cut/fill guidance.
    6. The operator follows the display: dig deeper, stop, slope left.

    The magic is in the fusion. The antenna answers “where,” the IMU answers “how bent,” and the math in between turns both into a bucket position the operator can trust.

    Excavator cab interior with machine guidance display screen
    The display compares bucket position against the design surface

    Single Antenna vs. Dual Antenna vs. IMU: What the Configuration Means

    Configuration What it knows Flat work Rotation / slopes Best for
    Single antenna, no IMU Machine position only ±8-12cm Unreliable Simple depth/slope, ±10cm work
    Single antenna + IMU Position + linkage angles ±3-5cm Degrades without heading Moderate-tolerance grading
    Dual antenna + IMU Position + heading + linkage angles ±2-3cm Holds ±3cm Structures, utilities, finished grade

    The table explains the price gap between guidance tiers. The dual-antenna + IMU configuration costs more because it answers the hardest question: where is the bucket while the machine is spinning and tilting?

    How to Tell What Your System Actually Has

    1. How many antennas? One antenna means no heading data. Two antennas mean the system knows the machine’s orientation, which is what holds accuracy during cab rotation.

    2. Are IMU sensors on all three linkages? Boom, arm, and bucket all need sensors for full 3D accuracy. Some budget systems put sensors on the boom only, which leaves the bucket angle a guess.

    3. Is the kit wireless? Wireless kits pair the antennas, sensors, and display without cabling. This matters for rental machines and mixed fleets, where the kit needs to move between machines.

    A system that says “GNSS guidance” on the box may be any of these configurations. Read the list, not the headline.

    A single-antenna system without IMU sensors is not suitable for structures, utilities, or finished grade with ±3cm contract tolerances. It also is not the right fit for steep slopes or confined sites where satellite visibility is poor. Match the configuration to the work, not the other way around.

    Decision Engine: If X → Choose Y

    If your contract tolerance is ±3cm or tighter (structures, utilities, finished grade) → choose a dual-antenna + IMU configuration with sensors on all three linkages. Nothing less holds accuracy through rotation and slopes.

    If your work is ±10cm bulk earthworks and mass grading → a single-antenna system without IMU is sufficient and costs half. The IMU premium buys accuracy you will not use.

    If your machine rotates the cab constantly while digging → dual antennas are non-negotiable; heading data is what holds position during rotation.

    If you rent machines or switch jobsites often → choose a wireless kit that transfers between machines; the configuration list stays the same, but installation time drops to 20-30 minutes.

    If you are troubleshooting an accuracy drop → verify the antenna fix quality first, then the IMU readings on all three linkages, then calibration. The fault is usually in one of those three.

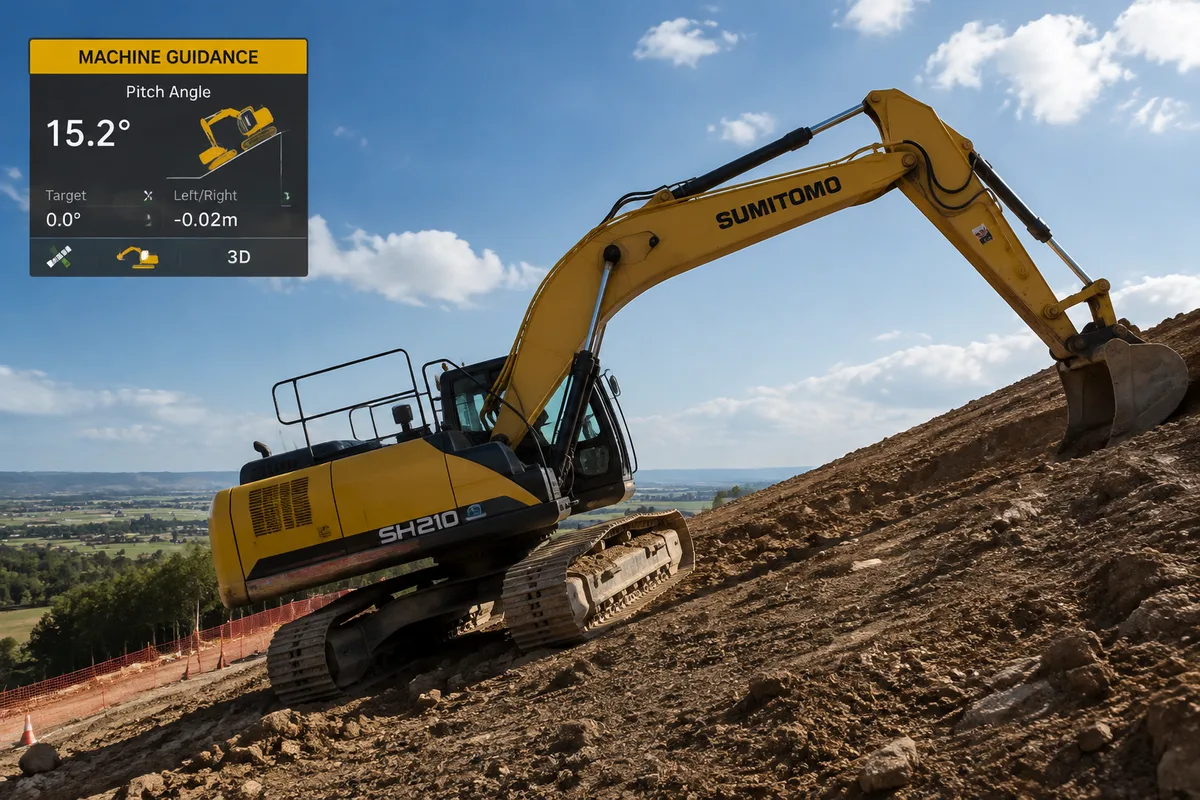
    Excavator working on steep slope with machine guidance system
    Dual-antenna + IMU holds accuracy while the machine tilts

    How to Verify the Components Are Working

    Check the antenna signal. The display should show the number of satellites and the RTK fix quality. If the fix indicator drops out, the antenna is losing signal from tree cover, deep cuts, or a failed correction source.

    Check the IMU readings. With the machine parked and level, the display should show zero angle on all linkages. Swing the machine 360 degrees and confirm the heading readout tracks the rotation. If a linkage reads a constant offset, that sensor needs recalibration.

    Dig a test trench and survey it. This is the ground truth. Compare the in-cab reading against a survey check of the same surface. If they disagree by more than the rated accuracy, something in the chain, antenna, IMU, or calibration, is off.

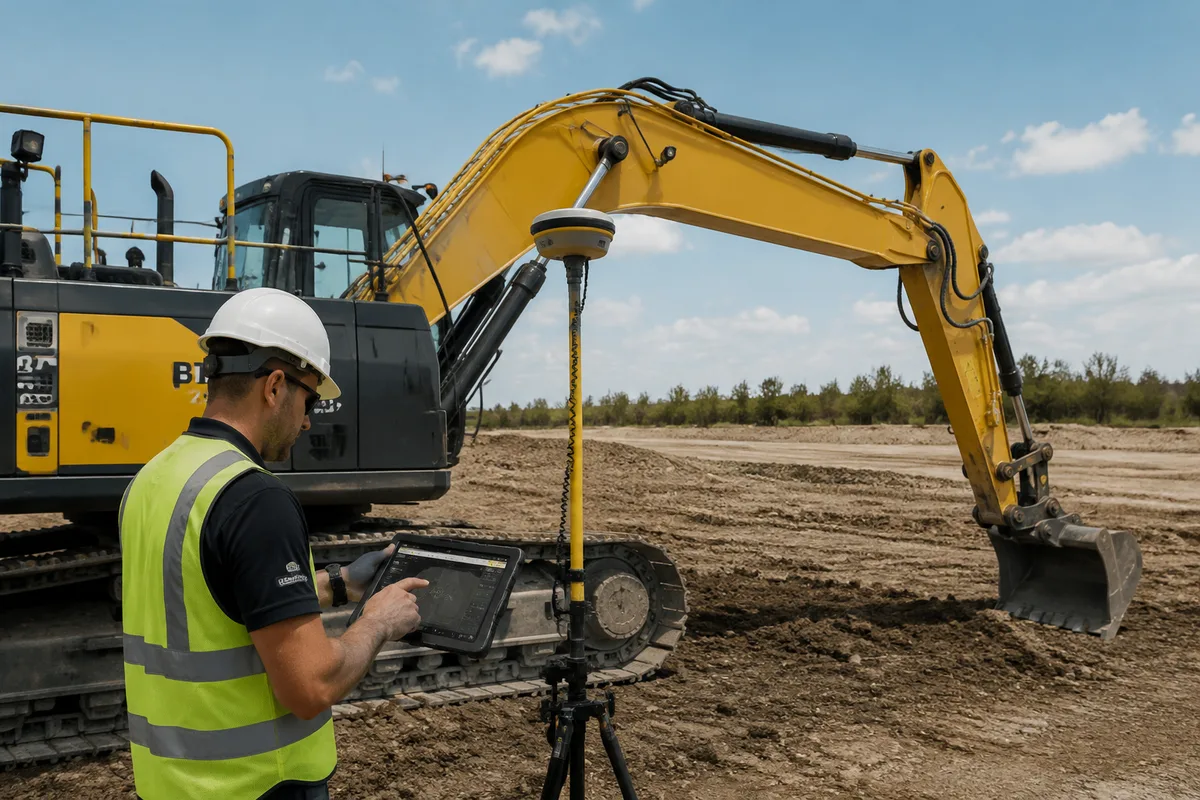
    Technician calibrating excavator guidance system with tablet computer
    Calibration enters linkage dimensions and performs swing calibration

    Conclusion

    The GNSS antenna and the IMU sensors are not competing components; they are two halves of one position calculation. The antenna finds the machine in space, the IMU sensors track the bucket through every boom, arm, and bucket movement, and the receiver fuses both into a position the operator can trust.

    When you buy a guidance system, read the configuration list, not the brand name. Count the antennas, check whether IMU sensors sit on all three linkages, and verify the kit fits your machines. Those three numbers decide whether your system holds ±3cm or drifts to ±10cm.

    If You Only Remember One Thing

    The GNSS antenna finds the machine; the IMU sensors track the bucket. A system needs both, and the configuration that holds ±3cm through rotation and slopes is dual-antenna + IMU on all three linkages. Read the configuration list before you buy.

    Get a Custom Quote

    Tell us your fleet size and the job types you run, and we will send pricing for the configuration that fits your contract tolerances.

    Frequently Asked Questions

    What is the difference between a GNSS antenna and an IMU sensor?
    +

    The GNSS antenna finds where the machine is in space, using satellite signals and RTK corrections. IMU sensors measure the angles of the boom, arm, and bucket linkages. The system combines both to calculate the bucket tip position.

    How many antennas does an excavator guidance system need?
    +

    One antenna gives machine position only. Two antennas add heading and orientation, which is what holds accuracy during cab rotation. Most ±3cm systems use dual antennas.

    Do I need IMU sensors on every linkage?
    +

    For full 3D accuracy, yes. Sensors on the boom, arm, and bucket linkages let the system track every movement. Systems with sensors on the boom only leave the bucket angle as an estimate.

    Why does my guidance accuracy drop when I rotate the cab?
    +

    Rotation changes the machine’s heading, and a single-antenna system without heading data loses track. A dual-antenna + IMU configuration maintains accuracy because it knows the machine’s orientation and every linkage angle in real time.

    Can I mix GNSS antennas and receivers from different brands?
    +

    Not reliably. Antennas and receivers need compatible signal handling and correction protocols. Buy the full system from one vendor to avoid integration problems.

    References & External Resources

    [1]

    Trimble: How Machine Control Works for ExcavatorsAuthority
    Manufacturer documentation on machine control technology
    [2]

    CHCNAV: GPS Machine Control for Excavators, Choosing the Right Approach
    GNSS manufacturer perspective on system selection
    [3]

    Topcon Positioning Systems: Guidance and Control Solutions for Excavators
    Machine control manufacturer product documentation
    [4]

    Hemisphere GNSS: Understanding GNSS Antennas and ReceiversAuthority
    GNSS antenna and receiver manufacturer technical documentation
    [5]

    DirtMatch: GPS Machine Control on Excavators and Dozers, The Complete 2026 Guide
    Practical contractor guide to machine control adoption

  • Wireless Excavator Guidance: Reducing Manual Grade Checks

    Wireless Excavator Guidance: Reducing Manual Grade Checks

    Nonnav · Updated August 23, 2026 · Estimated read time: 9 minutes

    Key Takeaways

    • A grade checker costs $3,000-8,000 per month and slows every task they touch. Wireless excavator guidance replaces that role with an in-cab display.
    • The step-by-step workflow in this guide shows how to move from stakes-and-checker digging to wireless guidance in six steps, with no cabled hardware and no permanent modification to the machine.
    • Wireless installation takes 20-30 minutes per machine, transfers between machines, and typically pays back in 2-4 months on precision work.

    $3-8k/mo

    Grade Checker Cost

    20-30 min

    Wireless Install

    2-4 mo

    Typical Payback

    <3%

    Rework Rate

    Why the Grade Checker Is the Most Expensive Role on Your Site

    The grade checker walks ahead of the machine, reads stakes, shouts adjustments, and re-checks the surface after every pass. The role looks cheap on paper. A mid-size contractor in the US pays $3,000 to $8,000 per month for a full-time checker, and that is before counting what the role costs in productivity.

    The real cost is the slowdown. Every time the machine waits for a reading, that is an hour of machine and operator time at $85 per hour. Every re-check that finds the bucket 4cm too high means another pass over the same ground. On a 40-acre site, the checker becomes the bottleneck that decides how much dirt moves per day.

    Wireless excavator guidance removes the checker from the equation entirely. The machine carries its own reference. The operator reads the display, not the surveyor.

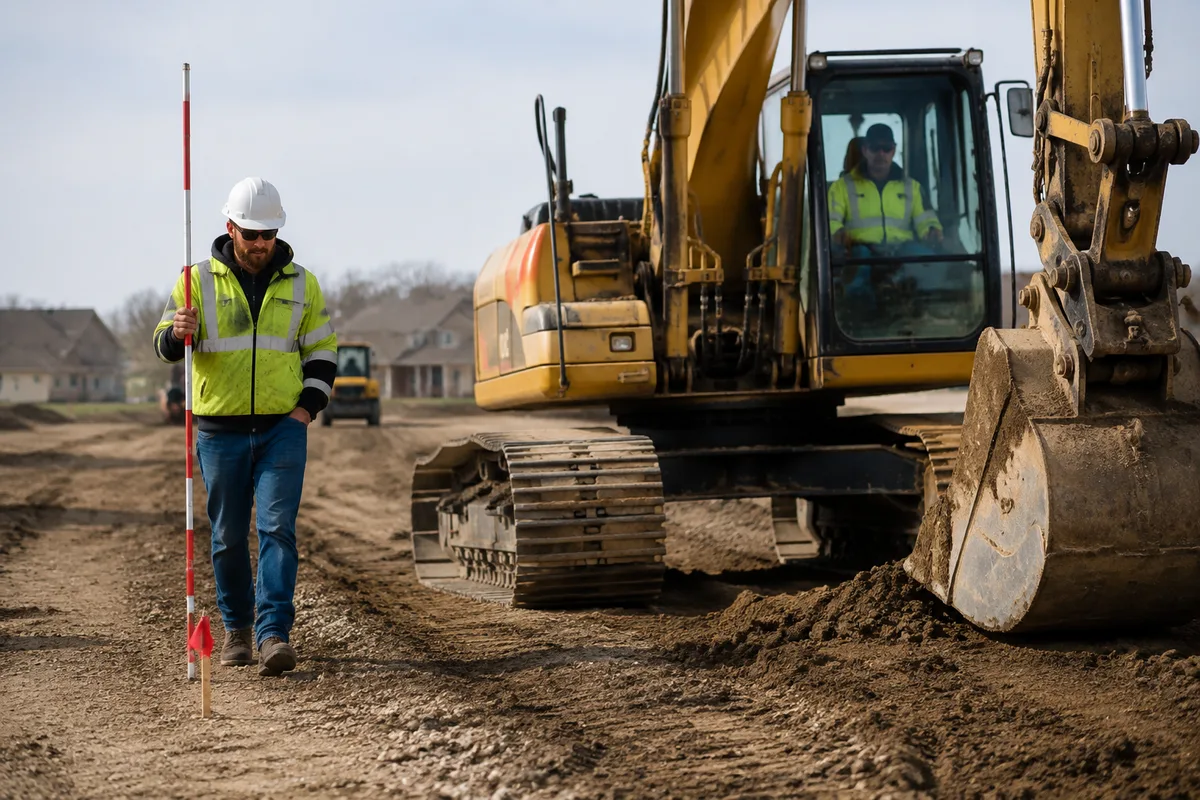
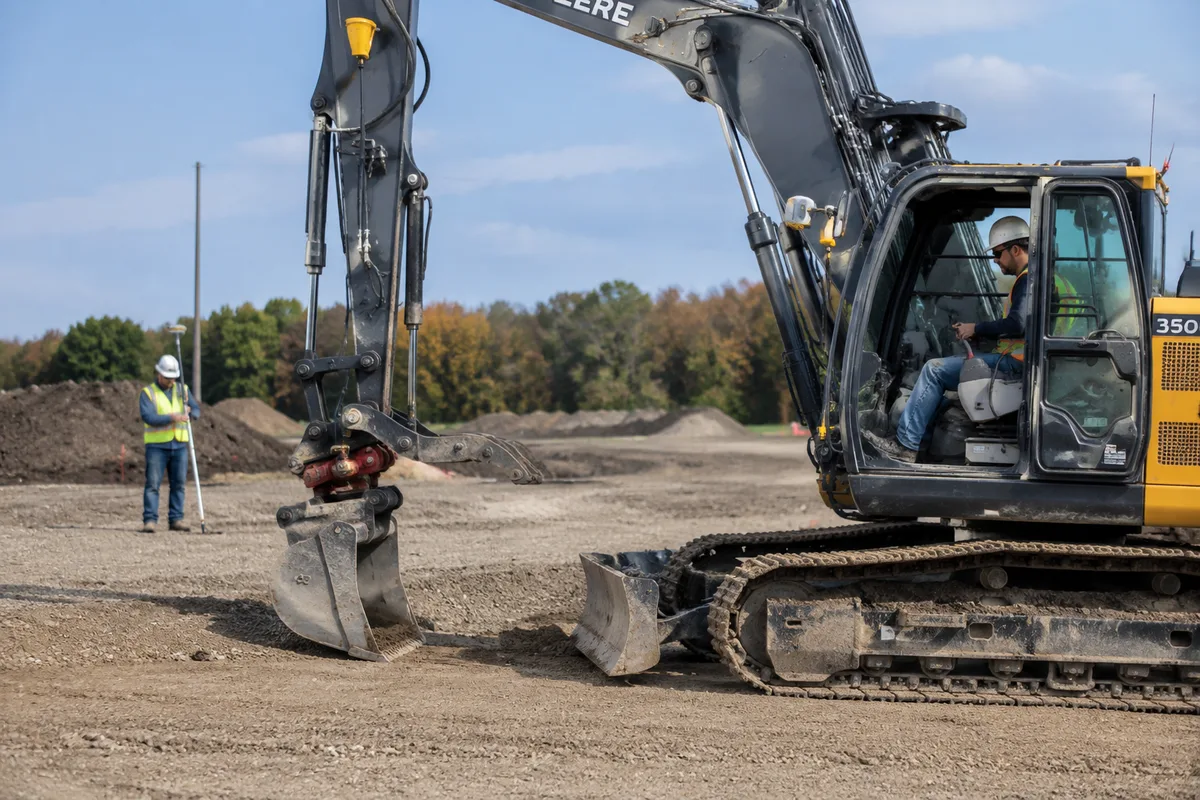
    Grade checker with survey rod walking beside excavator on construction site
    Traditional staking method: the checker reads stakes and calls adjustments

    How Wireless Excavator Guidance Works

    Wireless guidance uses the same principle as cabled systems, with one difference: no wires run between the roof antennas and the in-cab display.

    The hardware: GNSS antennas (one or two) mounted on the cab or boom, IMU sensors on the boom, arm, and bucket linkages, a receiver that fuses satellite position with IMU angles, an in-cab display that shows the bucket against the design surface, and a wireless link between the roof unit and the display.

    What wireless means for installation: the antennas, sensors, and display pair wirelessly. There is no cabling through the cab roof, no drilling, and no harness routing. The kit goes on in 20-30 minutes and comes off just as fast, which is what makes it viable on rental machines and mixed fleets.

    Traditional Grade-Checking vs. Wireless Guidance

    Dimension Traditional (Stakes + Checker) Wireless Guidance
    Setup time 2-4 hours for survey + stakes 20-30 minutes per machine
    Grade checking Continuous (checker follows machine) Zero (real-time display)
    Crew Operator + checker + surveyor Operator only
    Accuracy consistency Operator-dependent, drifts over shift Consistent ±2-3cm all shift
    Rework rate 10-15% of excavated volume Under 3% of excavated volume
    Night work Impossible without lighting + checker Full capability
    Machine transfer Cabled systems stay on one machine Wireless kit moves between machines
    Monthly cost $3,000-8,000 checker + survey time No checker; system pays back in months

    Step-by-Step Workflow: From Stakes to Wireless Guidance

    Step 1: Pick the Right Machine. Start with the machine that does the most precision work: final grade, sloping, or trenching. Do not retrofit the whole fleet at once. One machine with guidance, running consistently, proves the payback before you commit the fleet.

    Step 2: Load the Design File. The guidance system needs the 3D digital terrain model of the finished surface. Get the DTM from your surveyor or engineer, load it via USB or cloud, and verify it against the site benchmarks before digging.

    Step 3: Mount the Wireless Kit. Position the GNSS antennas on the cab roof or boom, attach the IMU sensors to the boom, arm, and bucket linkages, and mount the display in the cab. With a wireless kit, this takes 20-30 minutes. No cabling, no drilling, no harness routing.

    Step 4: Calibrate. Enter the boom, arm, and bucket dimensions into the system. Perform a full 360-degree swing calibration so the system learns the machine geometry. Then dig three test trenches and survey them to confirm the in-cab reading matches the ground truth.

    Step 5: Run a Checker-Free Shift. Let the operator work a full shift without a checker. The operator reads the display, which shows cut/fill in real time with color coding: red means above grade, green means at grade, blue means below. Survey the test area at the end of the shift. If deviation is within tolerance, the checker’s job is done.

    Step 6: Watch the Payback. Track machine hours, rework volume, and any remaining grade-checking time. With a 30% productivity gain and the checker eliminated, the typical payback is 2-4 months on precision work. If the machine runs guidance less than 60% of its operating hours, the payback stretches past a year, so keep guidance on the machines that earn it.

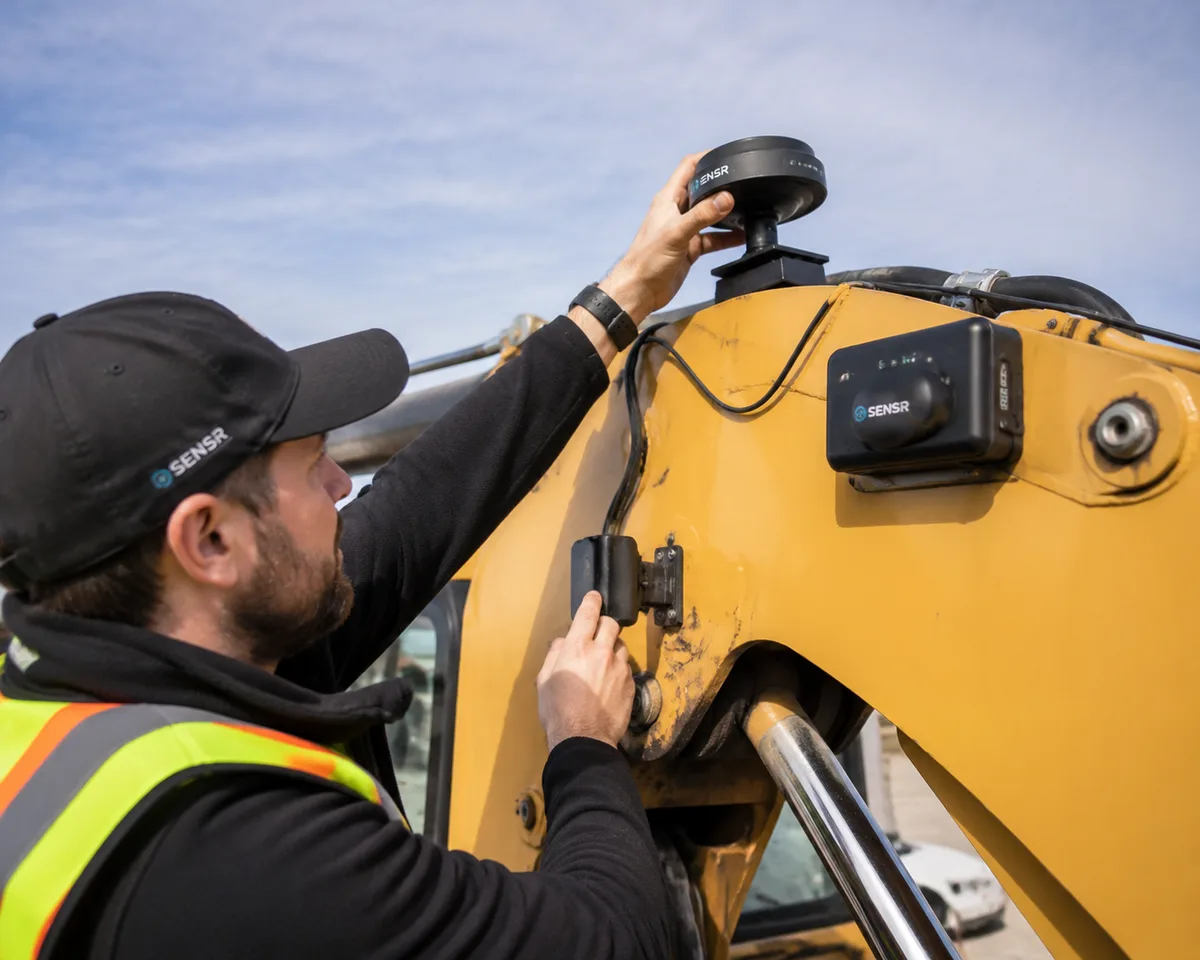
    Technician installing wireless GNSS and IMU kit on excavator boom without cables
    Wireless kit installs in 20-30 minutes with no cabling

    KEY DATA POINT

    Eliminating the checker also eliminates the productivity tax: at $85/hour for machine and operator, every reading the machine waits on is money the guidance display earns back the same hour.

    NOT SUITABLE WHEN

    One-off tiny digs, machines older than 15 years without hydraulic auxiliary ports, or sites where the design changes hourly without model updates. There the installation and calibration effort outweigh the savings.

    How to Get the Most Out of Wireless Guidance

    Keep the display where the operator can read it. Position matters. A display mounted at the wrong angle gets ignored after day one.

    Trust the numbers over muscle memory. The hardest adjustment for experienced operators is believing a 3cm reading over years of “feel.” Green means at grade. Believe it.

    Watch the RTK fix quality. Lost correction data, from tree cover or deep cuts, is the number one cause of silent accuracy loss. Operators need to know how to spot the fix-quality indicator and stop precision work until it recovers.

    Recalibrate after hard days. Digging rock and rough handling knock IMU sensors out of alignment. A quick calibration check at the start of each shift catches drift before it costs rework.

    Use the wireless transfer. The point of wireless is that one kit serves several machines. Move it to whichever machine is doing precision work that day, not just the one that always has it.

    Decision Engine: If X → Choose Y

    If you run 160+ machine hours per month on precision work → wireless guidance replaces the checker and pays back in 2-4 months. Adopt now.

    If you rent machines or switch jobsites often → choose a wireless kit that transfers between machines; a cabled system locks you to one machine.

    If your machine runs guidance less than 60% of its operating hours → the payback stretches past a year. Keep the checker for now and revisit the math later.

    If you are a mixed-fleet contractor → put the wireless kit on the precision machine during the day and move it to the bulk machine at night; one kit covers both.

    If your work is confined or under tree cover where satellites disappear → wireless GNSS alone will not hold accuracy; pair it with a local base station or consider total station guidance.

    How to Verify the Workflow Is Working

    1. Survey the test section at the end of week one. Compare the as-built surface against the design. Under 3cm deviation across the section is the pass mark.
    2. Track rework by week. Rework should drop by half in the first month as operators gain trust in the display.
    3. Measure hours per task. A task that took 8 hours with a checker should take 5-6 with guidance.
    4. Ask the operator for honest feedback. If they are ignoring the display, the problem is placement or trust, not the technology.
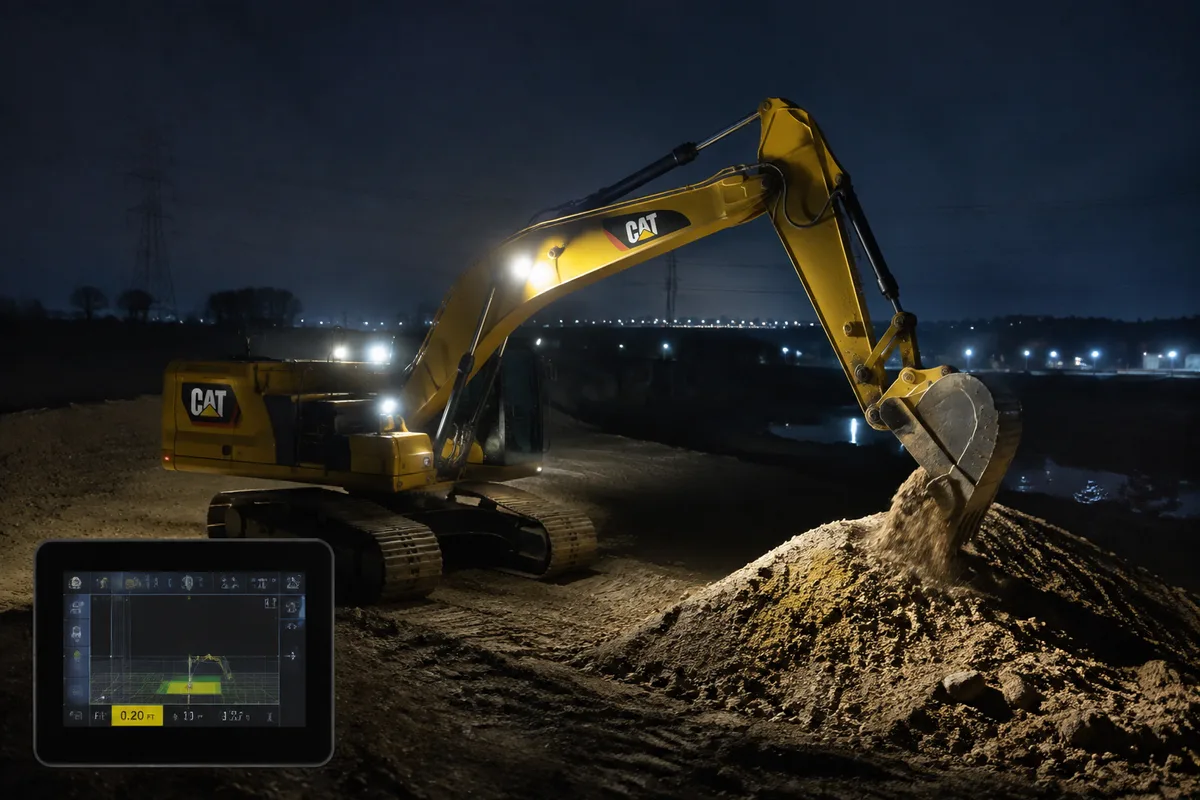
    Excavator working alone at night with illuminated guidance display
    Night operation works with no lighting crew and no checker
    Excavator final grade verified with wireless guidance kit
    Week-one verification: survey the test section against the design

    Conclusion

    The grade checker is the most expensive role on a precision earthworks site, not because of the salary, but because every reading slows the machine. Wireless excavator guidance removes the role, the stakes, and the rework in one change, with a kit that installs in 20-30 minutes and transfers between machines.

    The workflow is six steps: pick the machine, load the design, mount the wireless kit, calibrate, run a checker-free shift, and watch the payback. Most contractors see it pay back in 2-4 months.

    If You Only Remember One Thing

    Wireless excavator guidance eliminates the grade checker with a kit that installs in 20-30 minutes and transfers between machines. Pick one precision machine, load the design file, calibrate, and let the display replace the checker. Payback typically lands in 2-4 months.

    Get a Custom Quote

    Tell us your fleet size and the job types you run, and we will send pricing for the wireless kit that fits your contract tolerances.

    Frequently Asked Questions

    What is wireless excavator guidance?
    +

    Wireless excavator guidance uses GNSS antennas, IMU sensors, and an in-cab display to show the operator exactly where the bucket is against the design surface. The antennas and display pair wirelessly, so no cabling runs through the cab roof.

    How much does a grade checker cost?
    +

    A full-time grade checker costs $3,000-8,000 per month in the US, plus the productivity cost of every task that waits for a reading. Wireless guidance eliminates the role and its associated slowdowns.

    How long does wireless installation take?
    +

    About 20-30 minutes per machine. The antennas, sensors, and display pair wirelessly, so there is no cabling, drilling, or harness routing. The kit also transfers between machines.

    Is wireless guidance accurate?
    +

    Yes. Accuracy comes from the GNSS antennas and IMU sensors, which are identical to cabled systems. Wireless kits hold ±2-3cm with RTK corrections, the same class as cabled dual-antenna systems.

    Do I need to keep a grade checker after installing guidance?
    +

    Not for day-to-day work. Most operators reach 80% proficiency in 3-4 shifts, and a verified test section at the end of week one confirms accuracy. A backup checker after that is an unused $3,000-8,000 per month expense.

    References & External Resources

    [1]

    Construction Industry Institute (2024), RR-345 Earthwork Productivity StudyAuthority
    Industry research on machine control technology impact on earthwork productivity
    [2]

    Trimble: How Machine Control Works for ExcavatorsAuthority
    Manufacturer documentation on machine control technology
    [3]

    CHCNAV: GPS Machine Control for Excavators, Choosing the Right Approach
    GNSS manufacturer perspective on system selection
    [4]

    Topcon Positioning Systems: Guidance and Control Solutions for Excavators
    Machine control manufacturer product documentation
    [5]

    DirtMatch: GPS Machine Control on Excavators and Dozers, The Complete 2026 Guide
    Practical contractor guide to machine control adoption

  • How Much Does an Excavator GPS Guidance System Cost? (2026 Pricing)

    How Much Does an Excavator GPS Guidance System Cost? (2026 Pricing)

    Nonnav · Updated August 22, 2026 · Estimated read time: 9 minutes

    Key Takeaways

    • A full excavator GPS guidance retrofit runs $12,000 to $20,000 for a dual-antenna GNSS + IMU system, $8,000 to $15,000 for total station, and $2,000 to $5,000 for laser guidance.
    • The price is only half the story. Setup time, RTK subscription, calibration, and operator training add $1,500 to $3,000 to the first-year cost of a GNSS system.
    • A mid-size contractor typically recovers the investment in 2 to 4 months on precision-heavy work. The payback formula in this guide lets you calculate your own number before you buy.

    $14-25k

    ±3cm First-Year Total

    $7-12k

    ±10cm First-Year Total

    2-4 mo

    Typical Payback

    60%

    Usage Threshold for Payback

    What Drives the Price of an Excavator GPS Guidance System

    Excavator GPS guidance is not one product with one price. It is a stack of hardware and services, and each layer has its own cost. Before comparing quotes, it helps to know what you are actually paying for.

    The hardware stack: GNSS antennas (one or two, the dual-antenna setup is the biggest single cost driver), receiver, IMU sensors on boom, arm, and bucket, in-cab display, mounting kit and cabling (or wireless kit).

    The services: RTK correction subscription (annual), installation and calibration (usually a dealer service), and operator training (one to three days on site).

    The single biggest variable is accuracy class. A system that holds ±2-3cm needs dual antennas, IMU sensors, and an RTK subscription. A system that only needs ±10cm can get away with a single antenna and no IMU. That gap is where most of the price difference comes from.

    2026 Price Tiers: What Each Configuration Costs

    Configuration Hardware Install & Cal Annual RTK First-Year Total
    2D guidance (depth + slope, no GNSS) $2,000-4,000 $500-1,000 $0 $2,500-5,000
    Laser guidance (single plane) $2,000-5,000 $500-1,000 $0 $2,500-6,000
    Single-antenna GNSS (±10cm-class) $6,000-10,000 $800-1,500 $0-800 $6,800-12,300
    Dual-antenna GNSS + IMU (±3cm) $12,000-20,000 $1,500-3,000 $800-1,500 $14,300-24,500

    Prices are typical 2026 market ranges for retrofit kits on a 20-30 ton excavator, before dealer discounts and regional variation.

    What the Price Does Not Include

    1. RTK correction subscription. Network RTK (NTRIP) runs $800 to $1,500 per year. A dedicated base station avoids the subscription but costs $3,000 to $6,000 upfront and needs setup and security on every site.

    2. Setup time on each jobsite. A dual-antenna system with wireless installation takes 20 to 30 minutes to set up. Total station takes 30 to 60 minutes per setup. Laser needs re-leveling as work advances. At $85 per hour for machine and operator, setup time is a real line item.

    3. Calibration drift. High-accuracy systems are sensitive to calibration drift. When an IMU sensor goes out of alignment, the machine stops until recalibration.

    4. Operator training. Most operators reach 80% proficiency within 3 to 4 shifts, but the first shifts are slower than traditional digging. Budget the productivity dip.

    Dual antenna GNSS receiver installed on excavator boom for machine guidance
    Dual-antenna GNSS receiver mounted on the excavator boom, wireless with no cabling

    ROI Payback Calculator (Worked Example)

    Input Value Monthly Impact
    Hourly machine rate (excavator + fuel + operator) $85
    Operating hours per month 160
    Productivity gain from guidance (30%) 48 hrs saved +$4,080
    Grade checker eliminated +$4,000
    Material savings (over-excavation reduced) +$1,500
    Total monthly savings System: $19,000 $9,580 → payback ~2 months

    Formula: monthly savings = (hours saved × hourly rate) + (rework reduction × material cost) + (grade checker eliminated). Even at the conservative estimate (25% productivity, $3,000 checker, $1,000 material), the same system pays back in about 4 months.

    KEY DATA POINT

    A 2024 Construction Industry Institute study found machines running guidance 60%+ of operating hours were the only ones to pay back in under 12 months. Usage rate, not sticker price, decides payback.

    NOT SUITABLE WHEN

    One-off tiny digs, machines older than 15 years without hydraulic auxiliary ports, or sites where the design changes hourly without model updates. At those conditions the hardware cost outweighs the savings at every price tier.

    Decision Engine: Should You Buy at This Price?

    If your contract tolerance is ±3cm or tighter (structures, utilities, finished grade) → the dual-antenna GNSS + IMU system at $14,300-24,500 is not optional; no cheaper tier passes inspection.

    If you run 160+ machine hours per month on precision work → the payback is 2 to 4 months, and the system should pay for itself this season.

    If your work is ±10cm bulk earthworks and mass grading → a single-antenna GNSS system at $6,800-12,300 is the correct price point. The dual-antenna premium buys accuracy you will not use.

    If you grade 1-2 days per month → the payback does not work at any price tier. Keep stakes and grade checkers.

    If you rent machines or switch jobsites often → a wireless dual-antenna system that transfers between machines justifies the higher upfront price.

    How to Compare Quotes Like a Buyer

    1. Ask for the first-year total, not the hardware price. Install, calibration, and RTK are part of the real cost.
    2. Confirm the configuration list. Dual antenna? IMU on all three linkages? Wireless installation? Cabled?
    3. Test the quoted accuracy. A system rated ±2-3cm in the lab can drift to ±5-6cm in the field. Ask for a calibration test section on your site.
    4. Check the RTK source. Network RTK needs cellular coverage. A dedicated base station costs more upfront but works where coverage is weak.
    5. Get the payback math in writing. Use the formula in this guide and ask the dealer to show their numbers.
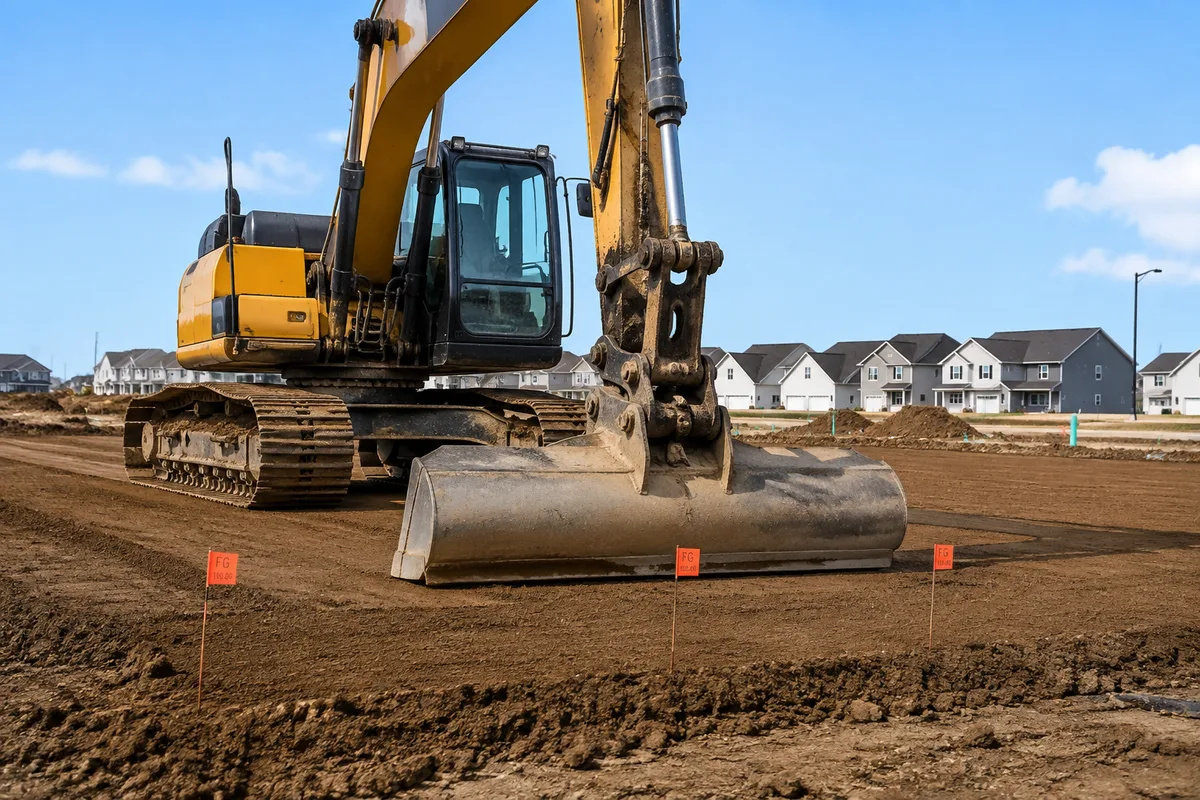
    Excavator doing final grade precision earthwork with survey markers on site
    Final grade work where ±3cm accuracy is written into the contract
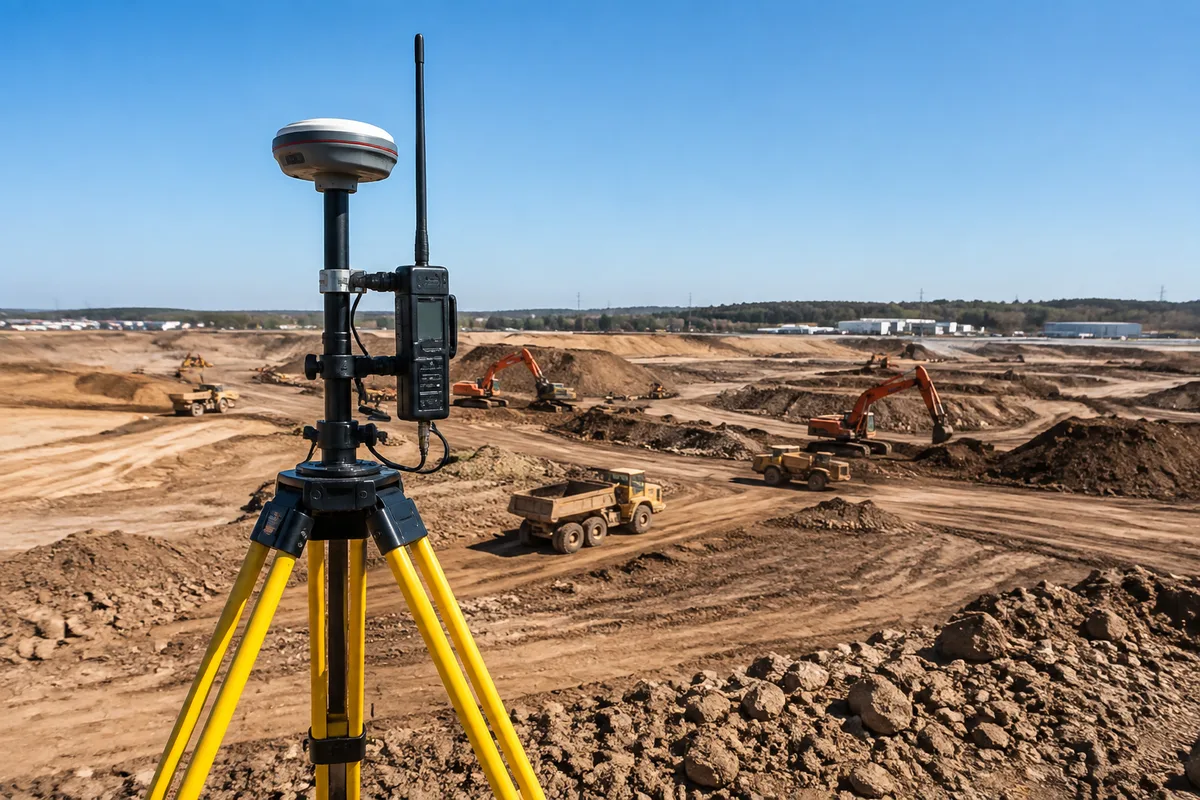
    RTK GNSS base station on tripod at edge of earthworks site
    RTK correction is the accuracy backbone for GNSS systems
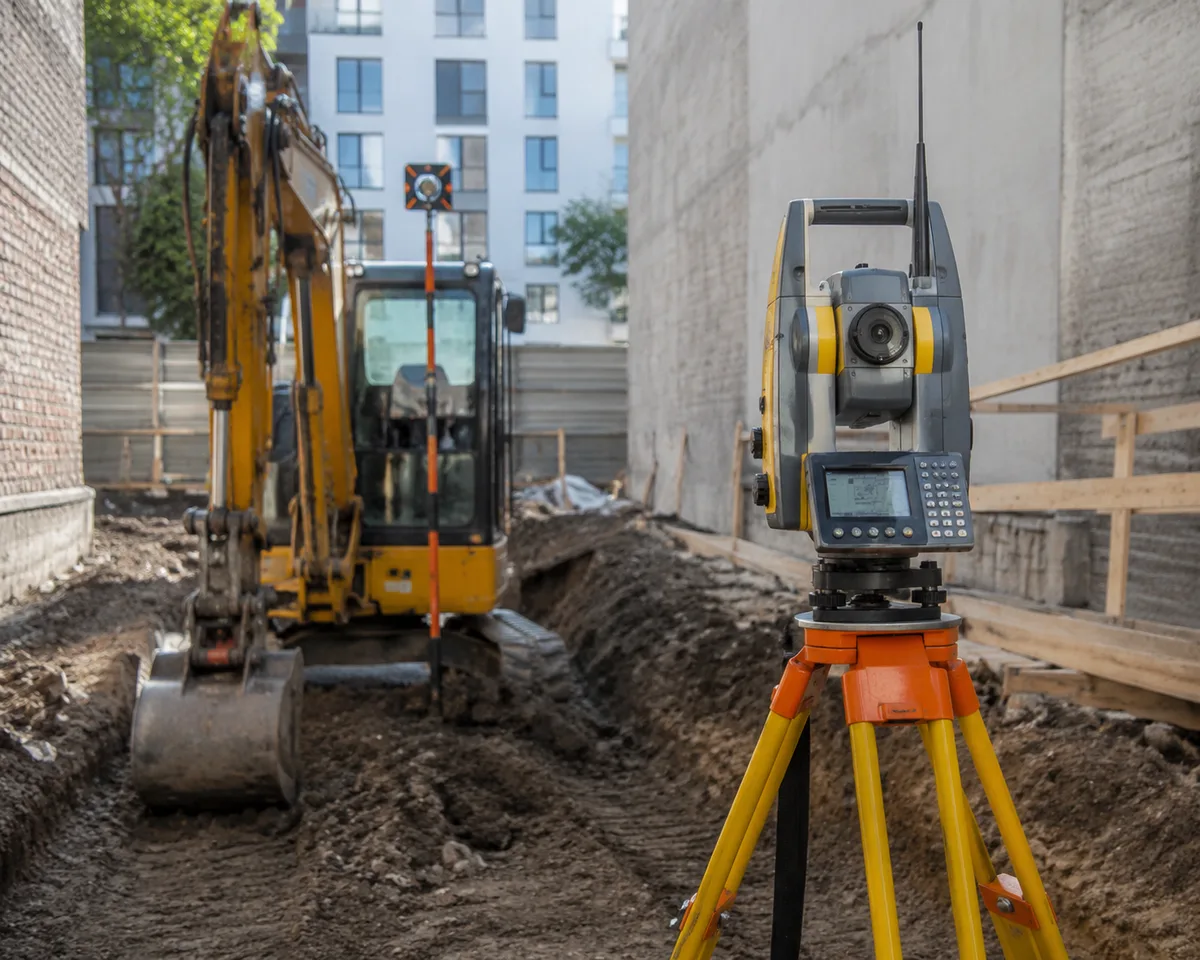
    Robotic total station tracking excavator on confined construction site
    Total station tracks one machine via prism at millimeter accuracy
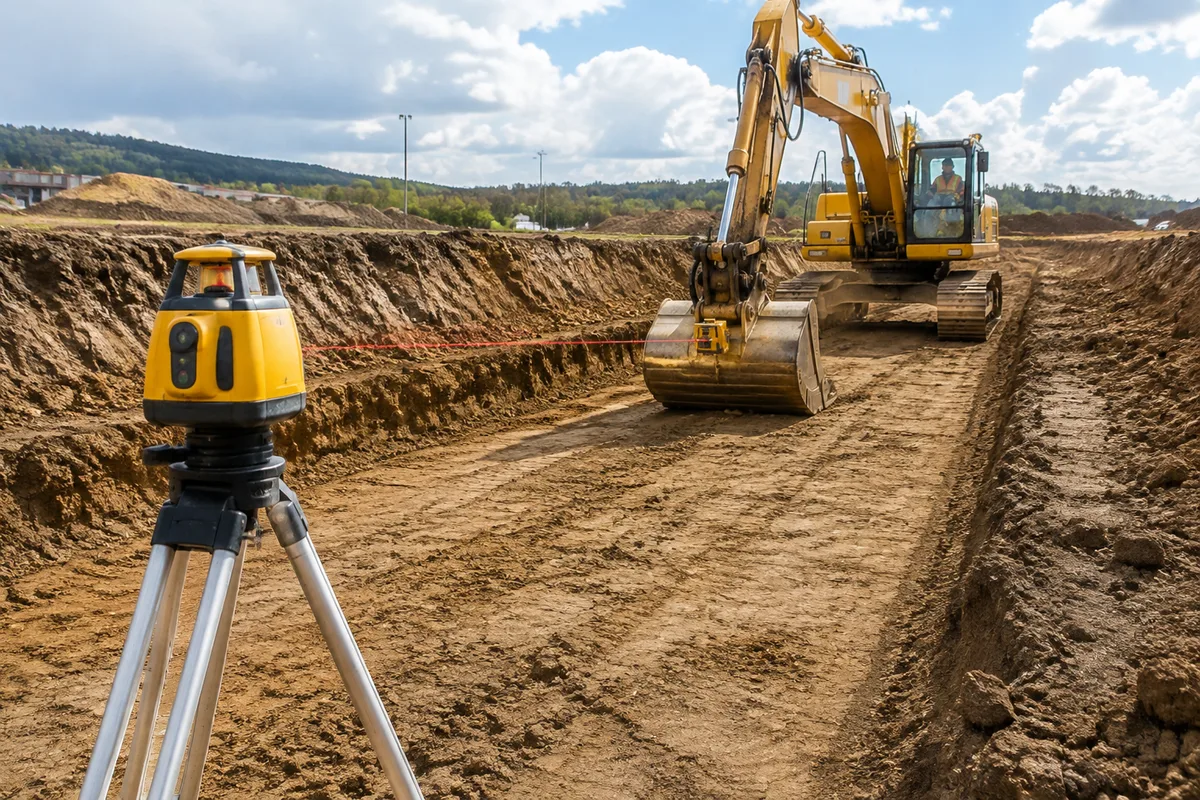
    Rotating laser level guiding excavator on flat trench bottom
    Rotating laser creates a reference plane for flat trench work

    Conclusion

    The honest answer to “how much does excavator GPS guidance cost” is: $2,000 to $25,000, depending on the accuracy tier you actually need. The dual-antenna GNSS + IMU system that holds ±3cm costs $14,300 to $24,500 in the first year and pays back in 2 to 4 months on precision-heavy work. The single-antenna ±10cm-class system costs half and suits bulk earthworks.

    Buy the tier that matches your contract tolerance, calculate payback with the formula in this guide, and get the first-year total in writing before you sign.

    If You Only Remember One Thing

    The first-year total for a dual-antenna GNSS + IMU system is $14,300-24,500, and it pays back in 2 to 4 months on machines running 160+ hours per month on precision work. Match the tier to your contract tolerance and calculate payback before buying.

    Get a Custom Quote

    Tell us your fleet size and the job types you run, and we will send pricing for the tier that fits your contract tolerances.

    Frequently Asked Questions

    How much does it cost to put GPS on an excavator?
    +

    A full GPS guidance retrofit costs $12,000 to $20,000 for a dual-antenna GNSS + IMU system, including hardware, installation, and first-year RTK subscription. A single-antenna ±10cm-class system runs $6,000 to $10,000.

    Can I install excavator GPS guidance myself?
    +

    Some wireless kits are designed for self-installation in about 20 to 30 minutes. Dealer installation and calibration typically costs $1,500 to $3,000 and is recommended for first-time buyers.

    Do I need a subscription for excavator GPS guidance?
    +

    Network RTK (NTRIP) correction runs $800 to $1,500 per year. A dedicated base station eliminates the subscription but costs $3,000 to $6,000 upfront. Laser and total station systems need no subscription.

    Is excavator GPS guidance worth the cost?
    +

    For machines running 160+ hours per month on precision work, the payback is 2 to 4 months. For occasional-use machines running less than 60% of hours, the technology often fails to pay for itself within a year.

    What affects the price most: accuracy or brand?
    +

    Accuracy class is the dominant cost driver. Dual-antenna + IMU systems that hold ±2-3cm cost 2 to 4 times more than single-antenna ±10cm-class systems, across all brands.

    References & External Resources

    [1]

    Construction Industry Institute (2024), RR-345 Earthwork Productivity StudyAuthority
    Industry research on machine control technology impact on earthwork productivity and payback
    [2]

    Trimble: How Machine Control Works for ExcavatorsAuthority
    Manufacturer documentation on machine control technology
    [3]

    CHCNAV: GPS Machine Control for Excavators, Choosing the Right Approach
    GNSS manufacturer perspective on system selection
    [4]

    Topcon Positioning Systems: Guidance and Control Solutions for Excavators
    Total station and machine control manufacturer product documentation
    [5]

    DirtMatch: GPS Machine Control on Excavators and Dozers, The Complete 2026 Guide
    Practical contractor guide to machine control adoption

  • GNSS vs Total Station vs Laser for Excavator Guidance

    GNSS vs Total Station vs Laser for Excavator Guidance

    Nonnav · Updated August 23, 2026 · Estimated read time: 11 minutes

    Key Takeaways

    • GNSS guidance works anywhere with open sky and covers the whole site at once, but its ±2-3cm accuracy depends on RTK corrections and satellite visibility.
    • Total station guidance holds ±5-10mm, the tightest of the three, but it needs a clear line of sight between the instrument and the machine, so it tracks one machine at a time.
    • Laser guidance is the cheapest and simplest option for flat, single-plane work like trench bottoms and slab subgrades, and it is the wrong tool for complex 3D grading.

    ±2-3cm

    GNSS Accuracy

    ±5-10mm

    Total Station / Laser

    $2-20k

    Hardware Range

    1-4 mo

    Typical Payback

    The Three Technologies, One Question

    Every excavator guidance system answers the same question: where is the bucket, and how far is it from where it should be? The three mainstream technologies answer it differently, and each answer comes with a different price, a different setup, and a different set of jobs it fits.

    This guide compares GNSS (satellite positioning), total station (optical tracking), and laser (rotating plane reference) guidance for excavators. It ends with a decision matrix that maps job types to the right technology, so the choice is driven by the work you actually do rather than by which salesman talks the loudest.

    How Each Technology Works

    GNSS Guidance. GNSS guidance uses satellites to fix the machine’s position, then IMU sensors on the boom, arm, and bucket calculate the bucket tip in 3D space. With RTK corrections, horizontal accuracy lands at ±2-3cm. Good for large sites, multiple machines, and complex 3D grading. Limited by satellite visibility: deep trenches, tree cover, and high walls block or degrade the signal.

    Total Station Guidance. A total station is a robotic optical instrument that tracks a prism mounted on the machine. It measures angles and distances to the prism, giving the bucket position with ±5-10mm accuracy. Good for precision work in confined or obstructed areas where GNSS loses signal. Limited by line of sight: the instrument must see the prism, so it tracks one machine at a time.

    Laser Guidance. A rotating laser on a tripod creates a reference plane. The machine’s receiver detects its height relative to that plane, and the operator gets a simple cut/fill readout. Good for single-plane work: trench bottoms, foundations, slab subgrades. Limited to one plane at a time: it cannot handle slopes, curves, or multi-plane 3D surfaces.

    Nonnav GNSS machine guidance hardware on excavator
    GNSS hardware set: antennas, IMU sensors, receiver, and in-cab display

    Head-to-Head: GNSS vs. Total Station vs. Laser

    Dimension GNSS (RTK + IMU) Total Station Laser
    Typical accuracy ±2-3cm horizontal ±5-10mm ±5-10mm in plane
    Coverage Whole site at once One machine at a time One plane at a time
    Line of sight needed No Yes (instrument to prism) No (receiver reads plane)
    3D multi-plane grading Yes Yes No
    RTK correction required Yes No No
    Hardware cost $12,000-20,000 $8,000-15,000 $2,000-5,000
    Setup per shift Minimal (wireless, stays on machine) 30-60 min tripod + reference 15-30 min, re-leveled
    Typical payback 2-4 months on precision-heavy jobs 3-6 months on confined precision work 1-3 months on flat production work

    Rotating laser level guiding excavator on flat trench bottom
    Rotating laser creates a reference plane for flat trench work

    Cost-Benefit: What You Pay Per Technology

    Cost Item GNSS Total Station Laser
    Hardware (retrofit) $12,000-20,000 $8,000-15,000 $2,000-5,000
    Annual RTK subscription $800-1,500 $0 $0
    Setup per shift Minimal 30-60 min 15-30 min, re-leveled
    Operator training Moderate Low Lowest

    The ratio that matters is cost per job completed, not sticker price. A $3,000 laser that finishes trench work 20% faster pays for itself fast. A $16,000 GNSS system that eliminates grade checking on a 40-acre site pays for itself faster still, because it removes the surveyor from the equation entirely.

    KEY DATA POINT

    Laser hardware runs $2,000-5,000, roughly a quarter of a GNSS system. On flat production work, that gap means a laser can pay for itself in one to three months of trench work alone.

    NOT SUITABLE WHEN

    Laser is not suitable for slopes, curves, or multi-plane 3D surfaces. Total station is not suitable for multiple machines roaming a large open site. GNSS is not suitable for deep trenches or under tree cover where satellites disappear.

    Decision Matrix: Match the Job to the Technology

    Job Type Tolerance Best Technology
    Bulk earthworks, mass grading ±10cm GNSS
    Complex 3D grading (slopes, curves) ±3cm GNSS
    Deep trenches, confined sites ±3-5cm Total station
    Tunnel portals, structures ±5-10mm Total station
    Trench bottoms, flat foundations ±5mm in plane Laser
    Slab subgrade, parking lots ±5-10mm Laser
    Mixed fleet, multiple jobsites varies GNSS (wireless, transferable)
    Night or low-visibility work varies GNSS

    Decision Engine: If X → Choose Y

    If your site is open, machines roam the whole site, and you need 3D grading → choose GNSS guidance. It is the only one of the three that tracks a moving machine across a large area without anyone on the ground pointing at it.

    If your work is confined, deep, or behind walls where satellites disappear → choose total station guidance. The optical link is a feature in those conditions, not a limitation.

    If your work is flat, single-plane production such as trench bottoms or slab subgrades → choose laser guidance. It is a fraction of the cost and does the job.

    If you run a mixed fleet and switch jobsites often → choose a wireless GNSS system that transfers between machines, and add a laser for the flat production jobs.

    If you need millimeter accuracy for structures → choose total station, and keep a laser as the cheap daily driver for flat work.

    Common Misconceptions

    “GNSS is always more accurate than laser.” False in the vertical plane. A laser reference plane is level to ±5-10mm, which beats GNSS vertical accuracy on flat work. GNSS wins on 3D coverage, not on raw precision for a single plane.

    “Total station is obsolete.” False. It is the accuracy champion in confined and obstructed sites, exactly where GNSS fails. The line of sight that looks like a weakness is what makes it work indoors, under bridges, and in deep cuts.

    “Laser can’t do real grading.” Mostly true, and that is fine. Laser does single-plane grading well. It is the wrong tool for slopes and 3D surfaces, but buying it for flat production work is smart money.

    “The most expensive system is the best investment.” False. The best investment is the system whose cost per completed job is lowest for the work you actually win. For a contractor who mostly digs flat trenches, a laser out-earns a GNSS system for years.

    How to Verify the Technology Choice on Site

    Before committing to a technology, run a three-day trial on a real job:

    1. Check the actual accuracy. Dig a test section and survey it. Compare the in-cab readout with the surveyed surface. Do it at the start and end of a shift to catch drift.
    2. Time the setup. Measure how long setup takes from arrival to digging. Setup time is the hidden cost that shows up in every bid.
    3. Watch the downtime. Count every stop caused by lost signal, lost line of sight, or re-leveling. Downtime is where a technology choice pays or bleeds.
    4. Ask the operators. The operator who lives in the cab will tell you within a day which system fights them and which one helps.
    Dual antenna GNSS receiver installed on excavator boom for machine guidance
    Dual-antenna GNSS receiver mounted on the excavator boom, wireless with no cabling
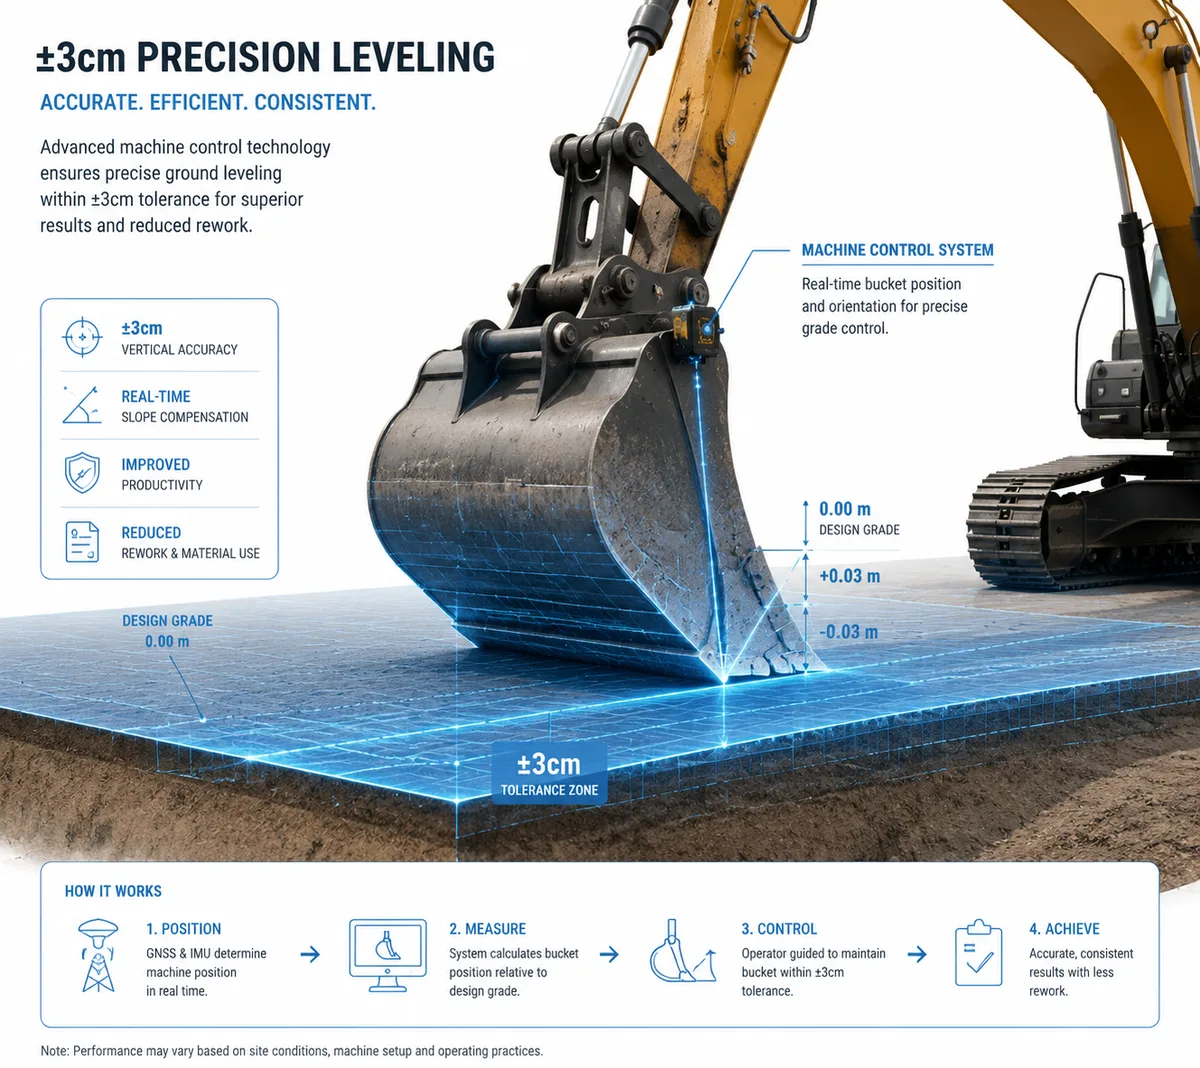
    Excavator leveling guidance operation with Nonnav system on construction site
    Leveling guidance: the display shows cut/fill relative to design grade
    RTK GNSS base station on tripod at edge of earthworks site
    RTK correction is the accuracy backbone for GNSS systems
    Nonnav mobile app interface showing machine guidance screens
    Mobile app covers project setup, real-time depth, and slope in five screens

    Conclusion

    GNSS, total station, and laser are not competing upgrades of the same thing. They are three different tools for three different jobs. GNSS covers the whole site and handles 3D grading; total station takes over where satellites disappear and delivers millimeter accuracy; laser does flat, single-plane production work at a fraction of the cost.

    Contractors who match technology to job type get the cheapest cost per completed job. Contractors who buy one system for everything pay for capabilities they never use, on jobs where a simpler tool would have finished first.

    If You Only Remember One Thing

    Match the technology to the job: GNSS for open-site 3D grading, total station for confined precision work, laser for flat production work. The cheapest cost per completed job is the right metric, not the sticker price.

    Get a Custom Quote

    Tell us your fleet size and the job types you run, and we will send pricing for the tier that fits your contract tolerances.

    Frequently Asked Questions

    Which excavator guidance technology is most accurate?
    +

    Total station holds ±5-10mm, the tightest of the three. GNSS holds ±2-3cm. Laser holds ±5-10mm within its reference plane but only on flat, single-plane work.

    Is GNSS or laser better for excavation?
    +

    For 3D grading and large sites, GNSS is better. For flat production work such as trench bottoms and slab subgrades, laser is better and much cheaper. The right answer depends on the job mix.

    Why use a total station instead of GPS?
    +

    Total station works where GPS loses satellite signal: deep trenches, under bridges, inside structures, and in confined urban sites. It also holds tighter accuracy (±5-10mm) for millimeter-critical work.

    How much does each guidance technology cost?
    +

    Laser retrofit runs $2,000-5,000. Total station runs $8,000-15,000. GNSS with RTK and IMU runs $12,000-20,000, plus an annual RTK subscription of $800-1,500.

    Can one excavator use all three technologies?
    +

    Not with one set of hardware. Each technology uses a different sensing principle. Some GNSS systems can be paired with a laser receiver for flat work, but a true all-in-one across all three is not a standard product.

    References & External Resources

    [1]

    Construction Industry Institute (2024), RR-345 Earthwork Productivity StudyAuthority
    Industry research on machine control technology impact on earthwork productivity
    [2]

    Trimble: Machine Control Technology Comparison (GNSS, Total Station, Laser)Authority
    Manufacturer documentation comparing machine control technology types
    [3]

    CHCNAV: GPS Machine Control for Excavators, Choosing the Right Approach
    GNSS manufacturer perspective on guidance technology selection
    [4]

    Topcon Positioning Systems: Guidance and Control Solutions for Excavators
    Total station and machine control manufacturer product documentation
    [5]

    DirtMatch: GPS Machine Control on Excavators and Dozers, The Complete 2026 Guide
    Practical contractor guide to machine control adoption

  • ±3cm vs ±10cm: Which Excavator Accuracy Do You Need?

    ±3cm vs ±10cm: Which Excavator Accuracy Do You Need?

    Nonnav · Updated August 23, 2026 · Estimated read time: 10 minutes

    Key Takeaways

    • Machine guidance accuracy is sold in spec sheets, but the accuracy your site actually needs is decided by the tolerance written into your contract and the type of work being done, not by what looks impressive on a brochure.
    • A decision framework exists: match the accuracy class to the project type. Specify ±3cm for structures, utilities, and final grade; ±10cm is plenty for bulk earthworks, rough cut, and non-critical fill.
    • Over-specifying accuracy costs real money: RTK + IMU systems that hold ±3cm typically cost 30-60% more than a ±10cm-grade system, and the extra precision is wasted on work that tolerates looser grading.

    ±2-3cm

    ±3cm Class Accuracy

    ±8-12cm

    ±10cm Class Practical

    30-60%

    Cost Premium ±3cm

    $7.5-12k

    First-Year Delta / Machine

    What Do ±3cm and ±10cm Actually Mean on Site?

    Before choosing, it’s worth being precise about precision. Accuracy classes describe how close the bucket teeth land to the design surface, measured statistically across a work shift.

    ±3cm accuracy means the bucket tip stays within 3 centimeters of the target plane for roughly 95% of the time under normal conditions. This is the class that modern dual-antenna GNSS + IMU systems deliver, the kind used for structural work, utility trenches, and finished slopes.

    ±10cm accuracy means the bucket tip can deviate up to 10 centimeters from the design. That might sound coarse, but for a 50-meter-wide embankment being raised 2 meters at a time, 10cm of tolerance is invisible in the finished product after compaction.

    The gap between the two is not 7 centimeters of “small difference.” It is the difference between a system that must fuse RTK corrections with IMU sensor data in real time (complex, calibrated, expensive) and one that can work with a single GNSS antenna and a simple depth reference (simple, rugged, affordable).

    Excavator bucket teeth aligning precisely with survey line and grade marker
    The bucket tooth is where accuracy is won or lost

    Why “Buy the Most Accurate System” Is Bad Procurement Advice

    The most common mistake in the industry is buying the most accurate system “just in case.” Here is why that reasoning fails:

    1. Accuracy costs money you can measure. A dual-antenna RTK + IMU setup typically costs 30-60% more than a single-antenna ±10cm-class system. That delta is real cash, and if your work never needs ±3cm, you are paying for capability you will never switch on.

    2. Precision slows down operations. High-accuracy systems are more sensitive to calibration drift. When an IMU sensor goes out of alignment on a rough site, the machine stops until recalibration. On bulk earthworks where the target is “close enough, compact it,” this downtime is pure loss.

    3. Over-specification hides in the tender. If your contract specifies a surface tolerance of ±50mm (5cm) after compaction, a ±3cm guidance system is the right match. If it specifies ±10cm, buying a ±3cm system is a procurement error, not a quality decision.

    4. The spec sheet number is not the site number. A system rated ±2-3cm in the lab can drift to ±5-6cm on a hot afternoon with poor satellite geometry or after a hard day of digging rock. Conversely, a ±10cm system on clean bulk grading holds its class reliably. The class is a design envelope, not a guarantee.

    The Accuracy Decision Framework: Match the Class to the Work

    This is the core framework that most guides skip. Instead of asking “how accurate can it be,” ask “what does this project type actually require?”

    Project Type → Recommended Guidance Class

    Project Type Contract Tolerance Recommended Class
    Structural foundations & footings ±3cm or tighter ±3cm (GNSS + IMU)
    Utility trenching (water, gas, conduit) ±3-5cm invert levels ±3cm (GNSS + IMU)
    Finished slopes & pavement subgrade ±3cm ±3cm (GNSS + IMU)
    Highway bulk earthworks / embankments ±5-10cm ±10cm-class or ±3cm
    Site cut & fill (rough) ±10-15cm ±10cm-class
    Subdivision mass grading ±10cm ±10cm-class
    Ponds, retention basins, landfill cells ±10cm or looser ±10cm-class
    Rock excavation & presplit ±10cm (benched) ±10cm-class

    How to read this table: find your dominant project type in the left column. If the middle column says ±3cm, buy a ±3cm system. If it says ±10cm, a ±10cm-class system is the correct, lower-cost choice.

    ±3cm vs. ±10cm: Head-to-Head

    Dimension ±3cm System ±10cm-Class System
    Typical accuracy ±2-3cm horizontal, ±3-5cm vertical ±8-12cm practical
    System cost High (dual antenna + IMU + RTK) Moderate (single antenna, simpler receiver)
    Installation time 30-60 minutes + calibration 15-30 minutes, less calibration
    Calibration sensitivity High; drift requires recheck Low; rugged, tolerant of rough handling
    Best for Structures, utilities, finished grade, slopes Bulk earthworks, rough cut/fill, mass grading
    Payback period 2-4 months on precision-heavy jobs 1-3 months on high-volume earthmoving
    Operator skill needed Comfortable reading 3D displays Simple depth/slope readout suffices
    Rework risk if under-specified Severe (contract tolerance missed) Low (tolerance absorbed by compaction)

    KEY DATA POINT

    The first-year cost delta between classes is roughly $7,500-12,000 per machine. For a five-excavator fleet, that is $37,500-60,000, the price of a small excavator or a year of fuel.

    NOT SUITABLE WHEN

    Bulk earthworks with ±10cm contract tolerance, rough sites that are hard on electronics, and high operator rotation. There, the extra precision never pays for itself and calibration becomes a net drag.

    What Does the Accuracy Spec Actually Cost You?

    Representative cost comparison for a mid-size contractor (2026 market ranges for retrofit systems):

    First-Year Cost: ±3cm vs. ±10cm-Class

    Cost Item ±3cm System ±10cm-Class System
    Hardware (antennas, receiver, display, sensors) $12,000-20,000 $6,000-10,000
    Installation & calibration $1,500-3,000 $800-1,500
    RTK correction subscription (annual) $800-1,500 $0-800 (often not required)
    Estimated total (first year) $14,300-24,500 $6,800-12,300

    Note: this compares accuracy classes, not brands. Total cost depends on dealer, region, and configuration. Get written quotes for both classes before deciding.

    RTK GNSS base station on tripod at edge of earthworks site
    RTK correction is the accuracy backbone for ±3cm systems

    Decision Engine: If X → Choose Y

    If your contract states surface tolerance of ±3cm or tighter (structures, utilities, finished slopes) → choose a ±3cm dual-antenna GNSS + IMU system. No lower-class system will pass inspection.

    If your contract states ±5-10cm (highway embankments, subdivision grading) → choose ±3cm if you also do precision work on other jobs; otherwise a ±10cm-class system is sufficient.

    If your work is bulk earthmoving with ±10cm+ tolerance (ponds, cut/fill, rock benches) → choose a ±10cm-class system and spend the savings on a second machine or more fuel hours.

    If you are a mixed-fleet contractor (some precision, some bulk) → put ±3cm on the machines that do precision work, ±10cm-class on the rest. One spec does not fit a mixed fleet.

    If you rent machines and install guidance per-project → choose wireless systems that transfer between machines; accuracy class matters less than installation speed here.

    Common Misconceptions About Accuracy Classes

    “More accuracy always means better quality.” False. Quality is meeting the contract tolerance. Delivering ±3cm on a ±10cm job is over-engineered spending, not better quality.

    “A ±10cm system can’t do precision work.” Mostly false. Some ±10cm-class systems with a single antenna and good RTK correction hold ±5-7cm, which passes many moderate-tolerance specs. The line between classes is not a cliff.

    “All GNSS guidance is basically the same accuracy.” False. The IMU fusion layer is what separates ±3cm from ±10cm. Systems without IMU sensors on the linkages cannot maintain accuracy during cab rotation and on slopes, exactly where excavators work.

    “I’ll upgrade later.” Partially true, but upgrade cost is often 60-80% of buying new. Decide the class up front; retrofitting IMU later is not a cheap bolt-on.

    Dual antenna GNSS receiver installed on excavator boom for machine guidance
    Dual-antenna GNSS receiver mounted on the excavator boom, wireless with no cabling

    How to Verify the Accuracy Your Site Actually Delivers

    Choosing a class is step one. Verifying it on site is step two, and the step that most contractors skip:

    1. Read the contract tolerance first. Write it down. This is your target, not the brochure.
    2. Dig a calibration test section. Compare the in-cab reading against a survey check of the same surface. Do this at the start of each project.
    3. Check mid-shift drift. Survey the test section again after 4 hours. If deviation grows, recalibrate before continuing precision work.
    4. Track rework by machine. If one machine consistently misses tolerance, it is a calibration or system problem, not an operator problem.
    5. Record the RTK fix quality. Lost corrections (driving under tree cover, in deep cuts) are the #1 cause of silent accuracy loss. Operators must know how to catch it.
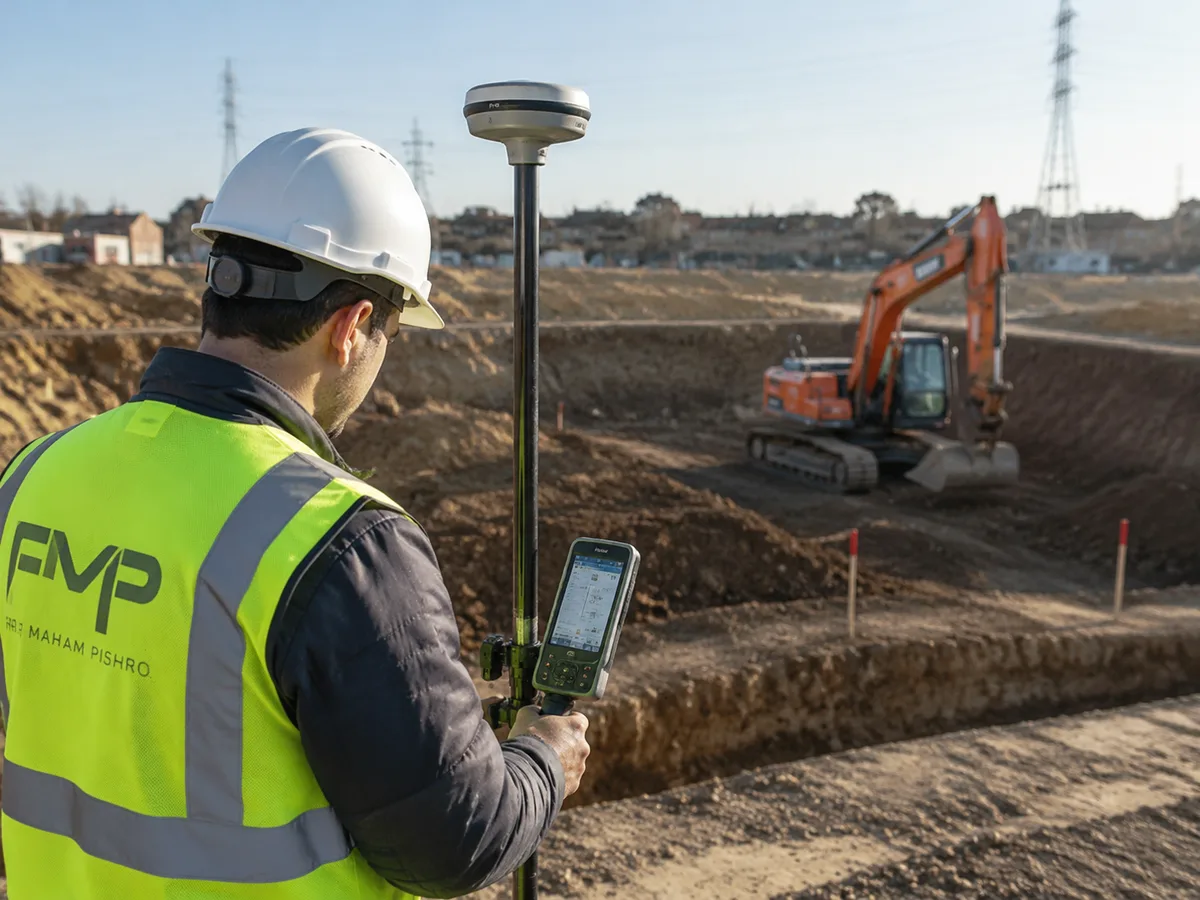
    Surveyor checking excavation grade with GNSS rover on construction site
    A survey check is the ground truth for any accuracy class
    Nonnav GNSS machine guidance hardware on excavator
    Complete hardware set: GNSS antennas, IMU sensors, receiver, and in-cab display
    Excavator leveling guidance operation with Nonnav system on construction site
    Leveling guidance: the display shows cut/fill relative to design grade
    Nonnav mobile app interface showing machine guidance screens
    Mobile app covers project setup, real-time depth, and slope in five screens

    Conclusion

    The accuracy question is “what accuracy does the work require,” not “how accurate can we buy.” The decision framework in this guide matches the ±3cm class to structures, utilities, and finished grade, and the ±10cm class to bulk earthworks and mass grading. It turns a vague equipment choice into a procurement decision with a clear payback.

    Contractors who match accuracy to the contract save $7,500-12,000 per machine and pass inspection. Contractors who buy the most accurate system available pay for both.

    If You Only Remember One Thing

    Match the accuracy class to the contract tolerance: ±3cm (GNSS + IMU) for structures, utilities, and finished grade; ±10cm-class for bulk earthworks. Buying more accuracy than the work requires is a measurable cost, not a quality decision.

    Frequently Asked Questions

    What is the difference between ±3cm and ±10cm excavator guidance?
    +

    ±3cm systems use dual GNSS antennas plus IMU sensors on the boom, arm, and bucket linkages, maintaining accuracy during rotation and on slopes. ±10cm-class systems are typically single-antenna with simpler processing, adequate for bulk earthworks but not for structures or utilities.

    Is ±10cm accuracy good enough for excavation?
    +

    Yes, for bulk earthworks, mass grading, ponds, and rock benches with ±10cm contract tolerance. No, for structural foundations, utility trenching, and finished slopes that specify ±3-5cm.

    Does higher accuracy excavator guidance cost more?
    +

    Yes. A ±3cm dual-antenna + IMU system typically costs 30-60% more than a ±10cm-class system, roughly $7,500-12,000 more per machine in the first year including installation and correction services.

    Can one system do both ±3cm and ±10cm work?
    +

    A ±3cm system can do both, it degrades gracefully to looser work. A ±10cm-class system cannot reliably do precision work. Mixed-fleet contractors typically put ±3cm on precision machines and ±10cm-class on bulk machines.

    How do I know what accuracy my site needs?
    +

    Read the contract surface tolerance for each project type, then use the decision framework: ±3cm for structures, utilities, and finished grade; ±10cm-class for bulk earthworks and mass grading.

    References & External Resources

    [1]

    [2]

    Trimble. “Understanding Machine Control Accuracy.”Authority
    Manufacturer documentation on machine control accuracy classes

  • What Is Excavator Machine Guidance? A Complete Guide for Contractors

    What Is Excavator Machine Guidance? A Complete Guide for Contractors

    Nonnav · Updated August 22, 2026 · Estimated read time: 12 minutes

    Key Takeaways

    • Excavator machine guidance uses GNSS satellites, IMU sensors, and in-cab displays to show operators exactly where the bucket is in 3D space, eliminating grade stakes and surveyors.
    • Contractors typically see 30-50% productivity gains, 40% reduction in over-excavation, and ROI measured in months, not years.
    • If your project requires ±3cm tolerance or tighter, machine guidance is no longer optional. It is the baseline for competitive bidding.

    +30-50%

    Productivity Gain

    -40%

    Over-Excavation

    ±2-3cm

    RTK Accuracy

    20-30 min

    Wireless Install

    What Is Excavator Machine Guidance?

    Excavator machine guidance (also called GPS excavator guidance, 3D machine control, or GNSS excavator guidance) tells the operator where the bucket teeth are in three-dimensional space, in real time, against a digital design model of the finished surface.

    Instead of wooden grade stakes, paper plans, or a surveyor shouting from the trench edge, the operator watches a live cross-section inside the cab. The screen shows how deep to dig, where to stop, and whether the slope matches the design, without stopping the machine.

    Excavator operator using 3D machine guidance display in cab
    The in-cab display shows real-time cut/fill guidance with color coding

    Core Components

    Component Function Location
    GNSS Antennas (1-2) Receive satellite signals from GPS, GLONASS, Galileo, BeiDou Top of cab or boom
    IMU Sensors Track machine pitch, roll, heading during movement Boom, arm, bucket linkages
    Receivers Process RTK corrections for centimeter accuracy Inside cab or antenna housing
    In-Cab Display Shows real-time bucket position vs. design model Dashboard-mounted
    Design Files 3D digital terrain model of the finished surface Loaded via USB or cloud

    Nonnav GNSS machine guidance hardware on excavator
    Complete hardware set: GNSS antennas, IMU sensors, receiver, and in-cab display

    How the Data Flows

    1. Satellites broadcast positioning signals to the machine’s GNSS antennas.
    2. The receiver applies RTK corrections from a base station or network (NTRIP), removing atmospheric errors to bring accuracy to ±2-3cm.
    3. IMU sensors on the boom, arm, and bucket measure every angle, calculating the exact bucket tooth position relative to the machine body.
    4. The system fuses satellite position + IMU angles to determine bucket tip location in 3D space.
    5. The in-cab display compares this live position against the design surface and shows cut/fill guidance.
    6. The operator follows the visual cues (dig deeper, stop, slope left) to match the design.

    A real one: On a highway embankment project in Hubei, China, a 20-ton excavator with a Nonnav dual-antenna system held ±3cm for an entire 8-hour shift. No grade checks. The operator said he got through work that used to take two machines.

    Nonnav mobile app interface showing machine guidance screens
    Mobile app covers project setup, real-time depth, and slope in five screens

    Machine Guidance vs. Traditional Methods

    Dimension Traditional (Stakes + Checker) Machine Guidance
    Setup time 2-4 hours for survey + stakes 20-30 minutes (wireless)
    Grade checking Continuous (surveyor follows machine) Zero (real-time guidance)
    Accuracy consistency Operator-dependent, drifts over shift Consistent ±2-3cm all shift
    Rework rate 10-15% of excavated volume <3% of excavated volume
    Night operation Impossible without lighting + surveyor Full capability (self-lit display)
    Crew size 2-3 (operator + checker + surveyor) 1 (operator only)
    Learning curve Years to become proficient Days to become productive

    Excavator machine guidance earthwork grading on construction site
    Precision earthwork grading where machine guidance eliminates rework

    KEY DATA POINT

    A 2024 Construction Industry Institute study found machines running guidance 60%+ of operating hours were the only ones to pay back in under 12 months.

    NOT SUITABLE WHEN

    One-off tiny digs, machines older than 15 years without hydraulic auxiliary ports, or sites where the design changes hourly without model updates.

    Types of Excavator Guidance Systems

    2D Guidance (Depth + Slope): Measures depth and slope along a single plane. Best for simple trenching, foundation footings, basic grading.

    3D GNSS Guidance (Full Surface Model): Loads the complete DTM into the cab with plan and cross-section views. Best for highway, drainage, subdivision earthworks.

    3D GNSS + IMU (Full Automatic): Adds IMU sensors to every linkage. Maintains bucket position during rotation, cab tilt, and ground shift. Most consistent ±3cm accuracy.

    Excavator leveling guidance operation with Nonnav system on construction site
    Leveling guidance: the display shows cut/fill relative to design grade

    When to Choose Which System

    If you… Choose
    Dig repetitive trenches with consistent depth 2D guidance (lowest cost)
    Work on complex grading with digital models 3D GNSS guidance
    Operate in challenging terrain with steep slopes 3D GNSS + IMU
    Need wireless installation on rental/multiple machines 3D GNSS + IMU (e.g., Nonnav system)

    How to Implement Machine Guidance on Your Site

    Step 1: Assess your fleet. Start with the machine that does the most precision work: final grade, sloping, trenching. Occasional-use machines should stay traditional.

    Step 2: Choose your RTK correction source. Dedicated base station (full control, no recurring fees) vs. Network RTK/NTRIP (no base station, subscription) vs. both for redundancy.

    Step 3: Install and calibrate. Modern wireless systems like Nonnav require no cabling between roof antennas and display. Installation takes about 20 minutes. Calibration: enter boom/arm/bucket dimensions, perform a full 360° swing calibration, then dig three test trenches against a survey check.

    Step 4: Train the operator. Most operators reach 80% proficiency within 3-4 shifts. Key points: reading the display color coding (red = above grade, green = at grade, blue = below), trusting the numbers, and catching lost RTK correction immediately.

    Dual antenna GNSS receiver installed on excavator boom for machine guidance
    Dual-antenna GNSS receiver mounted on the excavator boom, wireless with no cabling
    Inertial IMU sensor mounted on excavator bucket for machine guidance
    IMU inertial sensor on the bucket tracks bucket position in real time
    GNSS antenna and IMU sensor installation on excavator boom
    Wireless installation: antennas and IMU sensors mount without cabling

    ROI Estimate for Machine Guidance

    Factor Conservative Aggressive
    Productivity gain +25% +50%
    Over-excavation reduction -20% -40%
    Grade checker cost eliminated $3,000-5,000/mo $5,000-8,000/mo
    Fuel savings -10% -20%
    Machine wear reduction -5% -15%

    Example: Machine rate $85/hr × 160 hrs/mo, 30% productivity gain → 48 hrs saved. Plus $4,000/mo grade checker eliminated, $1,500/mo material savings. Total ≈ $9,580/mo saved → payback in 2-3 months.

    Decision Engine: Should You Adopt Machine Guidance?

    If your contract requires ±3cm or tighter → machine guidance is non-negotiable; it’s the baseline for competitive bidding.

    If you run 160+ machine hours/month on precision work → payback is typically 2-4 months; adopt now.

    If you grade only 1-2 days per month → keep stakes; the technology won’t pay for itself.

    If you rent machines or switch jobsites often → choose a wireless system that transfers between machines.

    Conclusion

    Excavator machine guidance has moved from a premium add-on to an operational baseline for any contractor working on competitive, precision-driven job sites. The technology eliminates grade checkers, cuts over-excavation by 20-40%, and improves productivity by 30-50%. Wireless systems that install in 20 minutes and retrofit to most modern excavators have made it practical for most contractors to adopt.

    Contractors who adopted it now hold grade on the first pass without a surveyor on site. Those who have not are still paying for grade checkers and rework.

    If You Only Remember One Thing

    The contractor who digs to ±3cm on the first pass, with no grade checker and no rework, will win every bid against the contractor who still chases stakes.

    Frequently Asked Questions

    How accurate is excavator machine guidance?
    +

    RTK systems deliver ±2-3cm horizontal and ±3-5cm vertical accuracy under normal conditions. Dual-antenna + IMU systems (like the Nonnav excavator guidance system) keep this accuracy during full cab rotation and on steep slopes.

    Can I install machine guidance on a rented excavator?
    +

    Yes, if the rental period justifies the installation, typically 2+ months. Wireless systems without hardwired cabling work well on rentals. Nonnav’s wireless installation leaves nothing permanently modified on the host machine.

    Do I need internet for machine guidance to work?
    +

    Network RTK (NTRIP) correction needs internet. The display, IMU sensors, and in-cab software all work offline. If using a dedicated base station, no internet is needed at all.

    How long does it take an operator to learn machine guidance?
    +

    Most operators reach 80% proficiency within 3-4 shifts. The display is designed to be intuitive: green means at grade, red means too high, blue means too low. The hardest adjustment is trusting the numbers over muscle memory.

    Does machine guidance work in deep trenches or under tree cover?
    +

    Accuracy drops where satellite visibility is blocked. In deep narrow trenches and under dense canopy, visible satellites decrease and RTK fix quality suffers. For these conditions, a local base station with a radio link outperforms network RTK.

    References & External Resources

    [1]

    Construction Industry Institute (2024), RR-345 Earthwork Productivity StudyAuthority
    Industry research on machine control technology impact on earthwork productivity
    [2]

    Trimble: How Machine Control Works for ExcavatorsAuthority
    Manufacturer documentation on 3D machine control systems
    [3]

    SpatiX: Revolutionizing Excavation with 3D Intelligent Guidance Systems
    Industry blog on 3D excavator guidance technology
    [4]

    DirtMatch: GPS Machine Control on Excavators and Dozers: Complete 2026 Guide
    Practical contractor guide to machine control adoption
    [5]

    CHCNAV: GPS Machine Control for Excavators: Choosing the Right Approach
    GNSS manufacturer perspective on machine guidance selection